


Key Takeaways
Complete guide to decorating your graduation cap with step-by-step instructions, creative design templates, materials guide, school rule compliance tips, and ideas for preserving this milestone achievement keepsake.
Decorating your graduation cap transforms a standard piece of ceremonial regalia into a personal statement celebrating your unique journey, achievements, and personality. What began as a grassroots tradition among creative students has evolved into an anticipated graduation ritual where graduates showcase everything from academic accomplishments and future plans to heartfelt thank-yous and humorous reflections on their educational experiences.
Yet many graduates approach cap decoration with more enthusiasm than strategy, resulting in designs that fall apart mid-ceremony, violate school policies requiring last-minute changes, or fail to achieve the visual impact they envisioned. This comprehensive guide provides step-by-step instructions for creating beautiful, durable, policy-compliant graduation cap decorations along with creative design templates inspiring your personal design while avoiding common pitfalls that undermine your celebratory vision.
Understanding Graduation Cap Decoration Rules and Guidelines
Before purchasing supplies or sketching designs, understanding your institution’s decoration policies prevents disappointment and wasted effort on designs you’ll need to remove or modify.
Common School Policy Requirements
Most schools allowing cap decoration establish guidelines balancing personal expression with ceremony decorum and safety:
Size and Dimension Restrictions:
Schools typically require decorations to remain flat or nearly flat on the mortarboard surface. This restriction prevents decorated caps from obstructing other graduates’ or audience members’ views during ceremonies when hundreds of students sit in rows. Designs protruding more than 1-2 inches above the cap surface generally violate these policies.
Decorations must stay confined to the mortarboard top—the flat square surface—without extending onto the sides, hanging off edges, or attaching to the tassel. This requirement maintains uniformity and prevents decorations from becoming distracting during processionals and recessionals.
Content Appropriateness Standards:
Acceptable decoration content typically must be:
- Free from profanity, vulgar language, or inappropriate imagery
- Non-political and non-controversial (avoiding divisive statements unrelated to education)
- Respectful toward all individuals and groups (no discriminatory content)
- Free from commercial advertising or brand promotion
- School-appropriate (suitable for audiences including young children and grandparents)
Some institutions restrict references to alcohol, drugs, or party culture even in humorous contexts, viewing graduation as formal academic celebrations rather than casual social events.
Material and Safety Considerations:
Schools often prohibit materials that could damage the caps (which many institutions collect after ceremonies for reuse), create messes (loose glitter that falls onto other graduates), or pose safety concerns (sharp objects or anything that could detach and create tripping hazards).
Battery-operated lights, sound-making elements, or other electronic additions typically require specific approval if allowed at all, as they can distract from ceremony proceedings.
Getting Approval and Avoiding Last-Minute Problems
Research Policies Thoroughly:
Check multiple sources for decoration guidelines:
- Review student handbooks or graduation planning documents
- Check school or district websites for graduation information
- Contact the graduation coordinator or administration office directly
- Attend any graduation meetings where policies are explained
- Ask teachers or counselors familiar with previous years’ policies
Different institutions vary significantly—some schools prohibit all decorations while others embrace creative expression with minimal restrictions. Don’t assume your school’s policies match what friends at other schools describe.
Submit Designs for Pre-Approval When Required:
Some schools require graduates to submit decoration designs for approval before the ceremony. These approval processes typically involve:
- Sketching or photographing your planned design
- Submitting through designated channels (email, online form, in-person review)
- Allowing several days for review and feedback
- Making any requested modifications
- Receiving final approval before proceeding
Even when pre-approval isn’t mandatory, consider sharing your design concept with a graduation coordinator if you’re uncertain whether it complies with policies. This proactive approach prevents ceremony-day conflicts requiring you to remove decorations you spent hours creating.
Plan Alternative Designs:
If your first-choice design pushes policy boundaries, develop backup concepts you’d be equally happy with. Having alternatives ready prevents disappointment if your preferred design doesn’t receive approval.
Essential Materials and Tools for Cap Decoration
Gathering appropriate supplies before starting ensures smooth execution and professional-looking results.
Basic Decoration Supplies
Adhesives and Attachment Materials:
Proper adhesive selection prevents decorations from falling off mid-ceremony:
- Hot Glue Gun and Glue Sticks: Low-temperature hot glue guns work best, as high-temperature versions can melt the cardboard mortarboard. Hot glue provides strong, quick-setting adhesion for most materials.
- Craft Glue: E6000, Aleene’s Tacky Glue, or similar strong craft adhesives work well for items that need longer working time or more precise placement than hot glue allows.
- Adhesive Dots or Glue Dots: Pre-formed adhesive dots provide clean, mess-free bonding for lighter materials without the strings sometimes created by hot glue.
- Double-Sided Tape: Heavy-duty double-sided tape works for paper elements, photos, or lightweight fabric.
Avoid regular school glue sticks or weak adhesives that won’t hold throughout ceremonies, especially in warm outdoor conditions.

Lettering and Text Materials:
Creating clean, readable text requires appropriate materials:
- Vinyl Letters or Decals: Pre-cut adhesive letters provide the most professional appearance, available at craft stores or through online custom printing services
- Letter Stencils: Plastic or cardstock stencils enable consistent hand-painted or drawn lettering
- Cardstock or Foam Letters: Cut letters from colored materials using electronic cutting machines (Cricut, Silhouette) or hand-cutting with templates
- Paint Pens or Markers: Oil-based paint pens create bold, permanent text directly on cap surfaces
Base and Background Materials:
- Cardstock or Scrapbook Paper: Creates colored backgrounds covering the black cap surface
- Fabric or Felt: Adds texture and dimension to designs
- Printed Images or Photos: Personal photos, downloaded graphics, or printed designs sized appropriately for your cap
Decorative Elements and Embellishments
Adding Visual Interest:
Popular embellishment options include:
- Rhinestones, Gems, and Sequins: Add sparkle and visual appeal (applied individually with adhesive)
- Ribbon and Trim: Creates borders, adds color, or highlights specific elements
- Artificial Flowers: Popular for elegant designs or school color incorporation
- Buttons, Charms, or Small Objects: Represent interests, achievements, or personal symbolism
- Metallic Paper or Foil: Creates eye-catching accents
Paint and Color Materials:
- Acrylic Craft Paint: Covers cap surfaces or creates custom designs
- Spray Paint: Creates even base coats (used in well-ventilated areas)
- Paint Pens in Various Colors: Offers precision for detailed work
Tools and Workspace Setup
Essential Tools:
- Scissors and/or craft knife with cutting mat
- Ruler or measuring tape
- Pencil for sketching placement
- Toothpicks or small brushes for glue application
- Tweezers for placing small elements precisely
- Paper towels or rags for cleanup
Workspace Considerations:
Set up a dedicated workspace protecting surfaces from glue, paint, or other materials. Ensure adequate lighting for detailed work and allow space for the cap to lie flat while decorating and drying. Keep all materials organized and within reach to prevent searching mid-project.
Step-by-Step Decoration Process
Following a systematic approach ensures better results than working without planning or structure.
Step 1: Design Planning and Layout
Sketch Your Design:
Before touching your actual cap, sketch your design on paper sized to match the mortarboard dimensions (approximately 9.5" x 9.5" square for most caps). This planning helps you:
- Visualize final appearance
- Determine proper sizing for all elements
- Identify material needs
- Plan element placement avoiding the center button
- Ensure text readability from a distance
Create a Template:
For complex designs, create a full-sized template on cardstock or paper that matches your cap dimensions exactly. Cut out a small circle in the center representing the button area. This template allows you to arrange all elements, test layouts, and make adjustments before committing to the actual cap.
Transfer your approved layout to the template, marking exact placement for text, images, and decorative elements.
Step 2: Preparing Your Cap Surface
Clean the Cap:
Wipe down the mortarboard surface with a slightly damp cloth removing any dust or debris that could prevent proper adhesion. Allow the cap to dry completely before applying any materials.
Create a Base Layer (Optional):
Many designs benefit from covering the black cap surface entirely:

- Cut cardstock, fabric, or scrapbook paper to fit the mortarboard top, leaving the center button exposed
- Trace your cap onto the material and cut slightly smaller than the traced line to prevent edges from overhanging
- Attach the base layer using hot glue around the edges and center areas, smoothing to prevent bubbles or wrinkles
- Allow adhesive to set completely before adding additional elements
Base layers create cleaner appearances for designs incorporating school colors, provide better backgrounds for text readability, and offer easier surfaces for attaching certain decorative elements.
Mark Placement Guidelines:
Using a pencil, lightly mark the center point (around the button) and any alignment guides for centering text or images. These marks help maintain balance and symmetry during decoration.
Step 3: Applying Text and Main Design Elements
Start with the Largest Elements:
Work from largest to smallest elements, beginning with primary text or central images:
For Vinyl Letters:
- Peel backing and position carefully (vinyl is difficult to reposition once pressed down)
- Use a ruler or level to ensure straight alignment
- Press firmly across entire letter surface to secure adhesion
- Burnish edges with a credit card or similar tool for maximum stick
For Painted or Hand-Drawn Text:
- Use stencils or freehand letters with pencil first
- Paint or draw over pencil guides
- Allow paint to dry completely before touching or adding nearby elements
- Erase any visible pencil marks once paint dries
For Cut Letters or Shapes:
- Apply glue to the entire back surface, not just edges
- Position according to your template or guidelines
- Press firmly and hold for 10-15 seconds
- Allow adhesive to set before adding nearby elements
For Photos or Printed Images:
- Trim to exact desired size and shape
- Apply adhesive evenly across the entire back
- Smooth from center outward to prevent bubbles or wrinkles
- Consider laminating photos before applying for added durability and professional appearance
Step 4: Adding Decorative Elements and Embellishments
Once main elements are secure, add embellishments enhancing your design:
Creating Borders and Frames:
- Apply ribbon around cap edges using hot glue or strong craft adhesive
- Create borders around text or images using rhinestones, sequins, or other small elements
- Add decorative corners or accent areas balancing the overall design
Applying Individual Elements:
For rhinestones, gems, or similar small items:
- Apply tiny dots of glue to the cap surface (not the back of small items which can be difficult)
- Use tweezers to place items precisely onto glue dots
- Press gently to secure without shifting
- Work in small sections to prevent glue from drying before elements are placed
Adding Dimensional Elements:
If your design includes flowers, bows, or other 3D elements allowed by your school:
- Attach these last to prevent damage during other decoration work
- Use generous hot glue ensuring secure attachment
- Keep dimensional elements low-profile (under 1-2 inches) to prevent view obstruction
- Test security by gently tugging to ensure elements won’t detach
Step 5: Finishing Touches and Quality Check
Review Your Design:
Step back and evaluate your completed cap:
- Check text for spelling errors or crooked placement
- Ensure all elements are securely attached
- Verify visual balance and spacing
- Confirm the design reads well from a distance (not just up close)
- Test security of all attached elements with gentle pressure
Seal Your Design (Optional):
For painted designs or elements that might smudge:
- Apply clear acrylic sealer spray in light, even coats
- Allow to dry completely between coats
- Use in well-ventilated areas
- Avoid sealing over rhinestones or dimensional elements that might get clouded
Allow Full Curing Time:
Give all adhesives and paints at least 24-48 hours to cure completely before wearing or transporting your cap. This curing prevents decorations from shifting or detaching during the ceremony.
Creative Design Templates and Theme Ideas
Drawing from popular decoration approaches while adding personal elements creates distinctive caps that genuinely reflect your experience.
Academic Achievement and School Pride Themes
Major or Field of Study Designs:
Graduates celebrate their academic focus through subject-specific elements:
- STEM Fields: Incorporate scientific symbols, mathematical equations, circuit board patterns, or field-specific imagery (microscopes, beakers, coding symbols)
- Arts and Humanities: Feature artistic elements, literary quotes, music notes, theater masks, or creative representations of your discipline
- Business and Economics: Include stock market graphs, business symbols, or economics-related imagery
- Education Majors: Showcase inspirational teaching quotes, apple imagery, or “Future Teacher” declarations
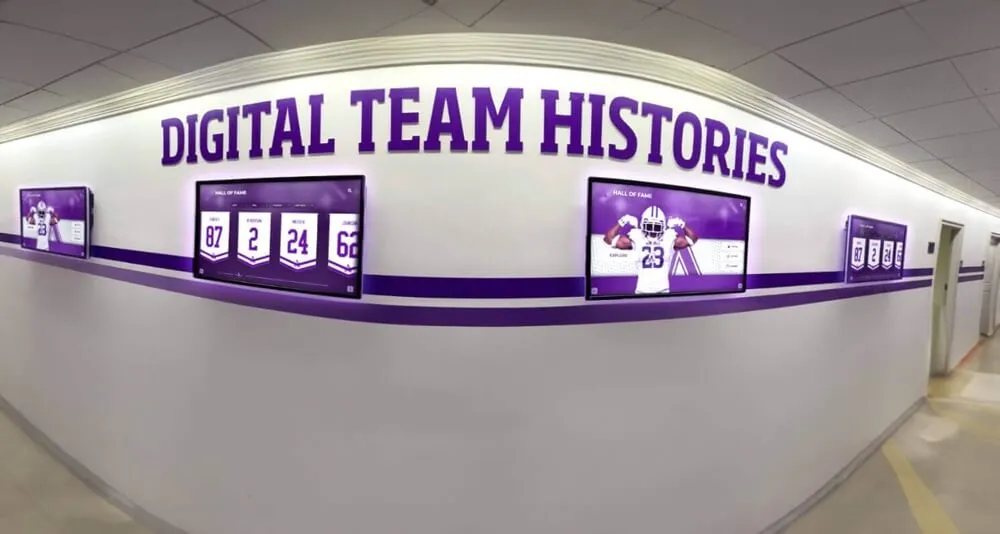
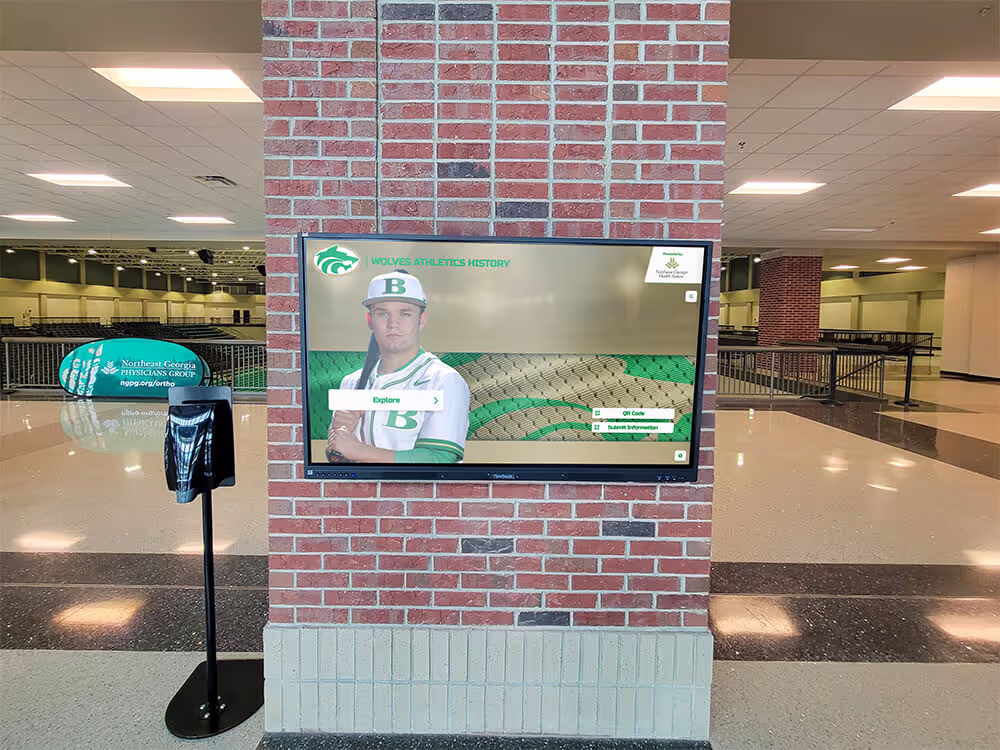
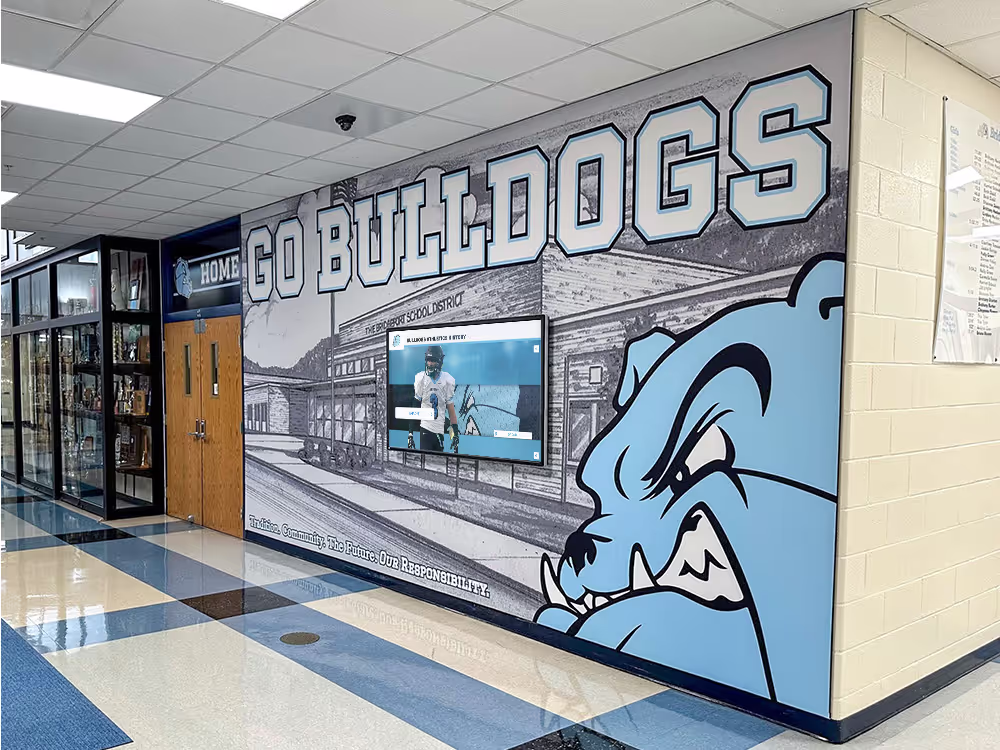
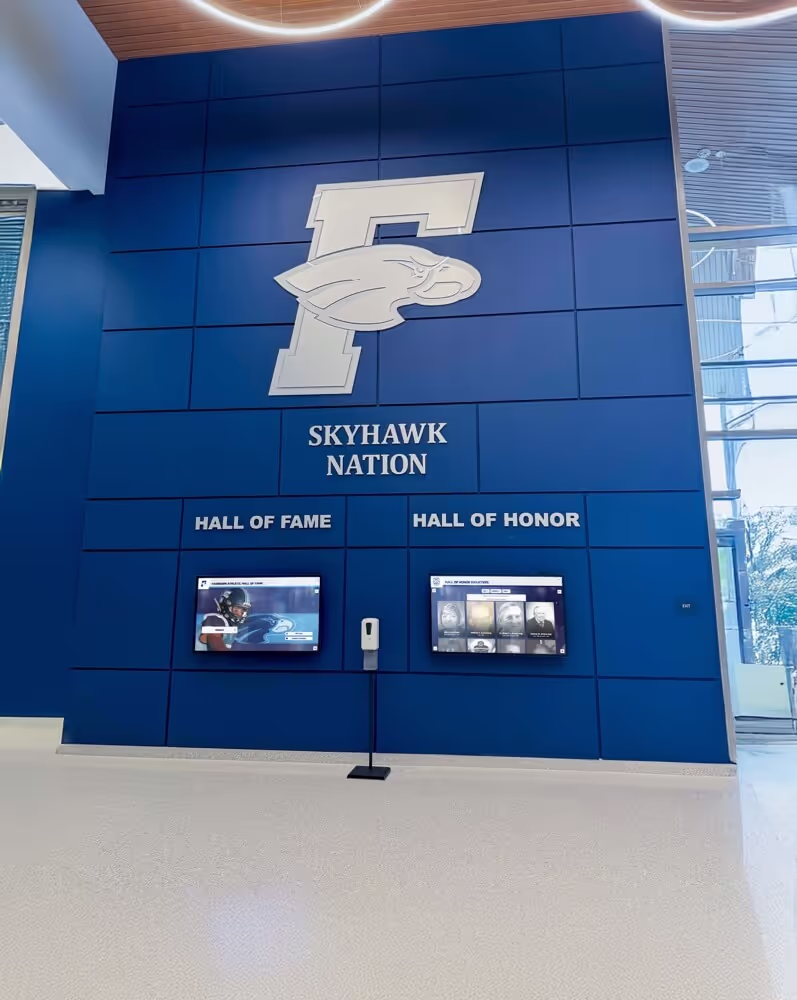
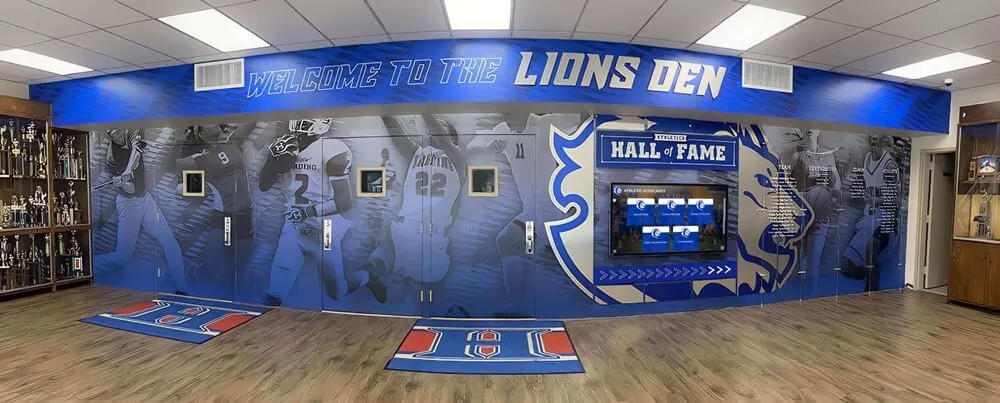
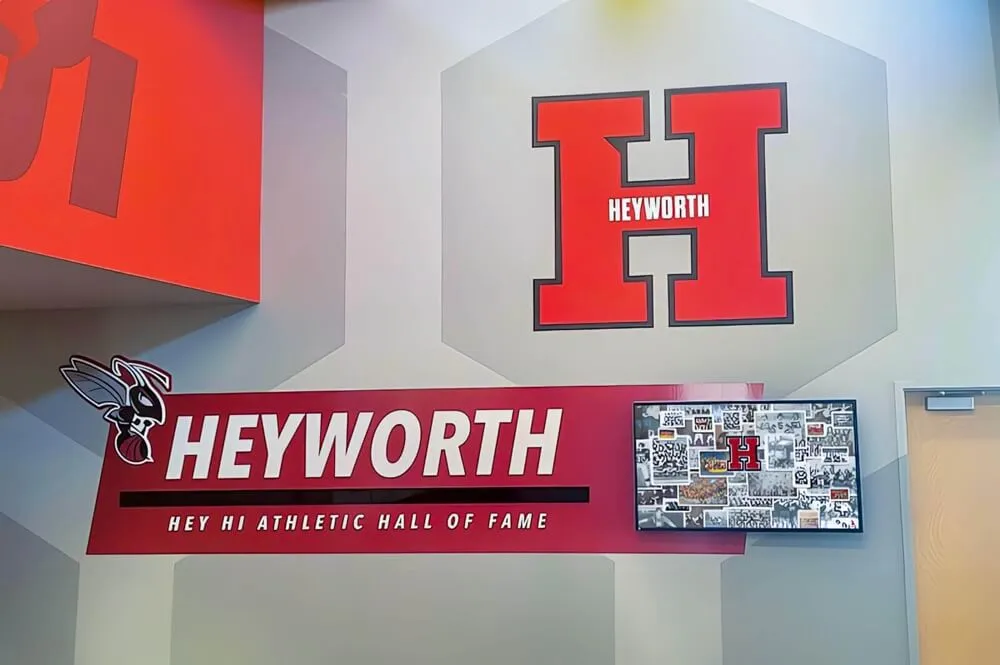
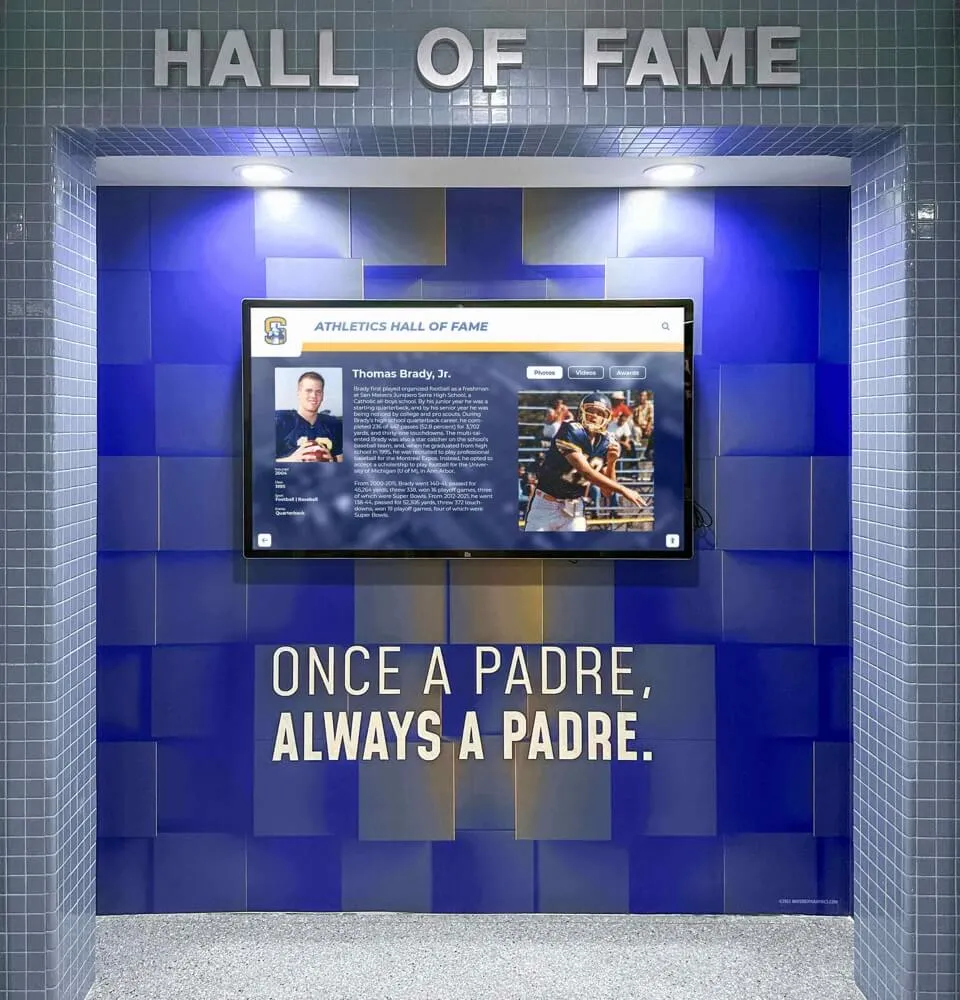
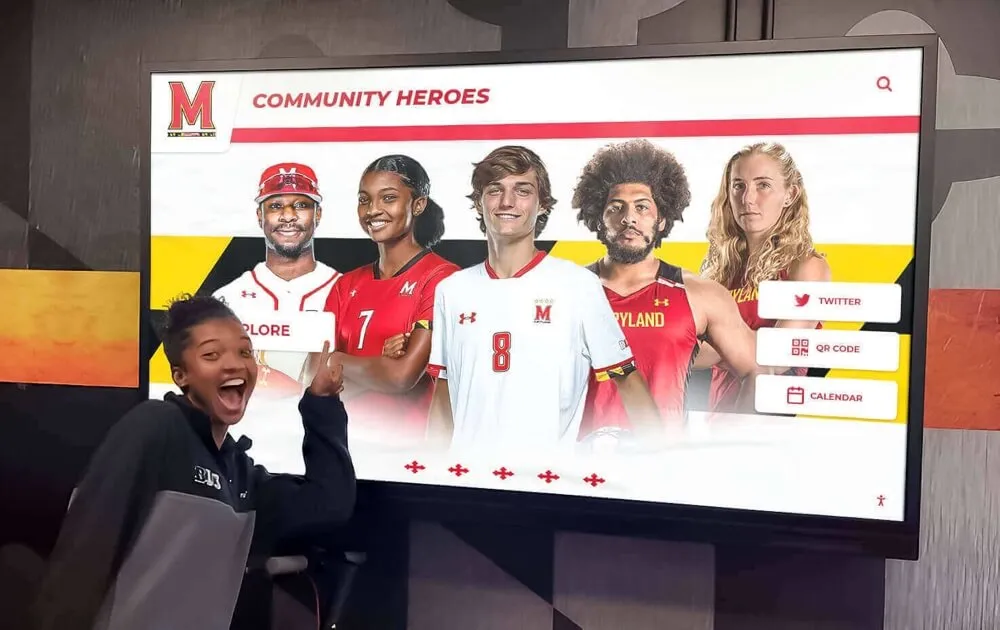
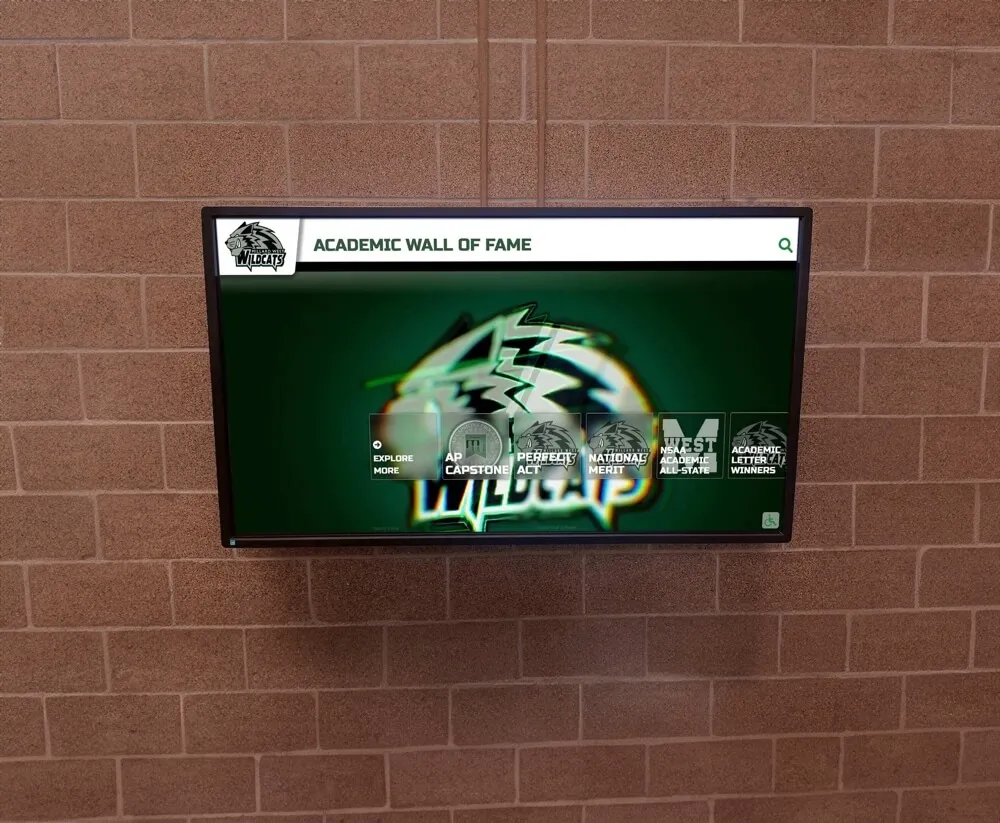
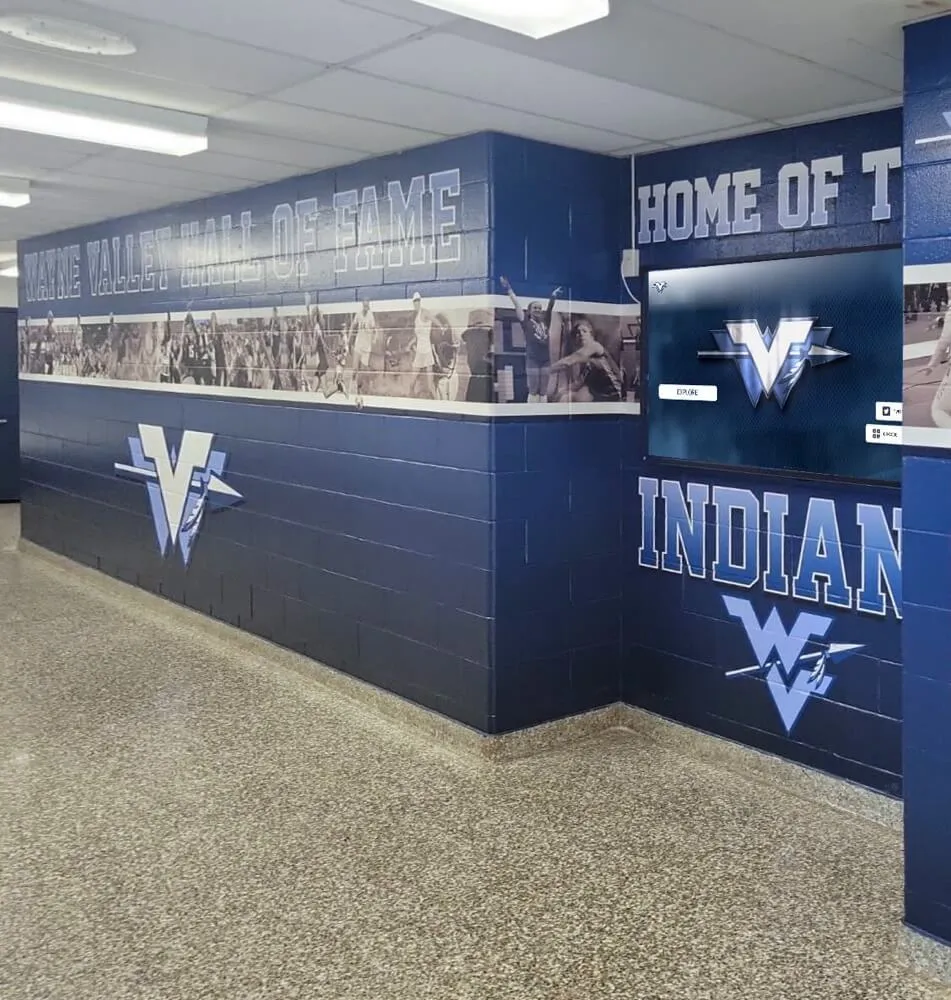
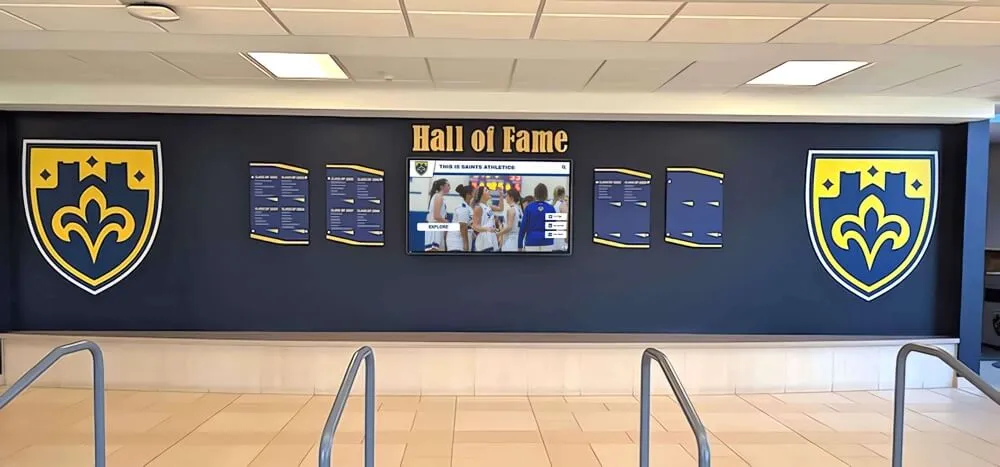
Many schools now celebrate these academic achievements through permanent digital recognition displays showcasing graduates’ accomplishments, majors, and future plans—creating lasting institutional documentation complementing personal cap decorations.
Honor Society and Academic Recognition:
Celebrate earned distinctions:
- GPA achievements: “4.0 and Out,” “Summa Cum Laude,” or actual GPA displays
- Honor society membership: NHS, Phi Beta Kappa, or discipline-specific organizations
- Latin honors: Magna cum laude, cum laude, or summa cum laude designations
- Academic awards or scholarships earned
Understanding academic honor recognition systems helps graduates appropriately celebrate their achievements on caps and through school ceremonies.
School Colors and Mascot Pride:
Show school spirit through:
- Complete color coverage in school colors
- Mascot imagery or silhouettes
- School mottos, fight songs, or traditional phrases
- Graduation year in school colors
- School logos or emblems (check policy regarding logo use)
These school-focused designs work particularly well for graduates with strong institutional connections, athletes, or those who’ve participated extensively in school activities. Schools often feature such graduate achievements on senior recognition displays celebrating their contributions to school communities.
Future-Focused and College/Career Themes
University Transfer Designs:
Graduates continuing education showcase next chapters:
- Future college logos and colors
- “See you at [University Name]”
- New school mascots or imagery
- Transfer student pride: “Community College to University” journeys
- Graduate school plans or specific program references
Career and Professional Path Themes:
Those entering the workforce celebrate career paths:
- Medical field: Stethoscope imagery, “Future Doctor/Nurse,” anatomy references
- Engineering: Blueprint patterns, structural designs, “Building the Future”
- Military service: Branch emblems, service mottos, patriotic themes
- Trades and technical fields: Tool imagery, specific craft representations
- Entrepreneurship: Business startup themes or venture references
Gap Year and Adventure Plans:
Some graduates highlight intentional pause before next steps:
- Travel destinations or world map imagery
- “Adventure Awaits” or “Taking the Scenic Route”
- Specific gap year program or service organization references
- Bucket list representations
Personal Interest and Hobby Themes
Sports and Athletics:
Athletic involvement frequently inspires cap designs:
- Sport-specific equipment imagery (soccer balls, basketball hoops, running shoes)
- Jersey numbers or team mottos
- Career statistics for multi-year athletes
- “4 Years, 1 Team, Memories Forever” or similar sentiments
- Conference championships or tournament achievements
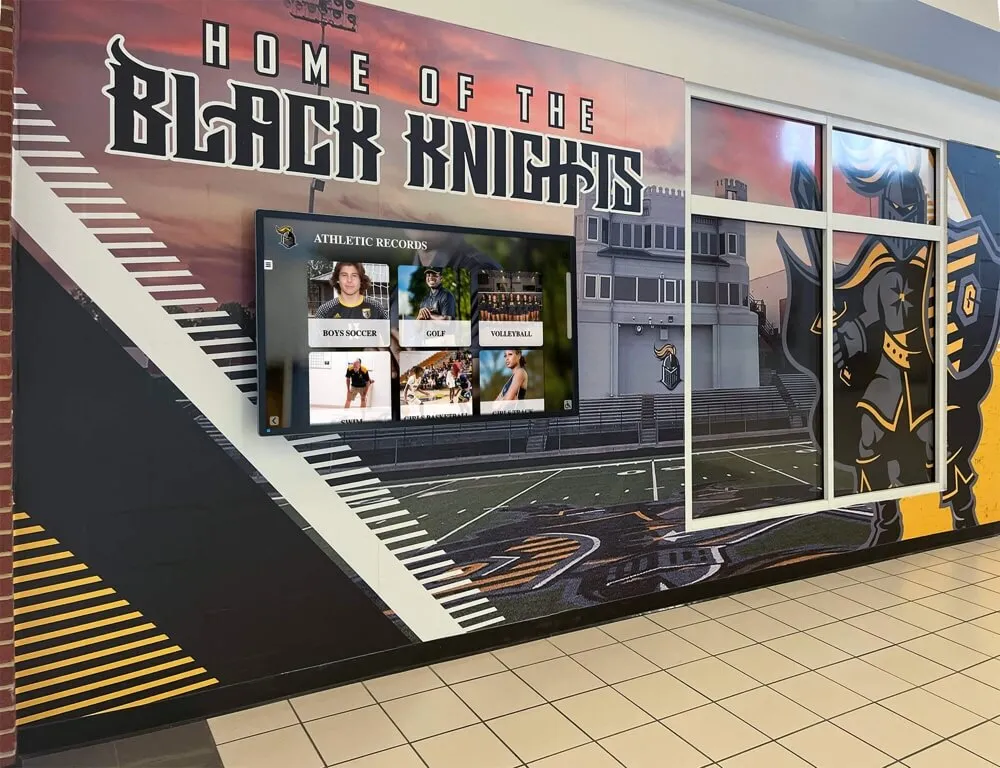
Many schools preserve these athletic achievements through comprehensive recognition programs honoring student athletes alongside academic achievers.
Arts, Music, and Performance:
Creative students showcase their passions:
- Musical instruments or notes
- Theater masks and “All the world’s a stage” references
- Dance imagery and movement representations
- Visual art elements or paint palettes
- Film or photography camera imagery
Clubs and Organization Involvement:
Celebrate meaningful activities:
- Debate team, forensics, or speech recognition
- Student government or class officer roles
- Volunteer organizations or service clubs
- Academic competition teams
- Special interest groups that defined your experience
Pop Culture and Entertainment Themes
Movie and TV References:
Popular culture provides endless inspiration:
- Disney movie quotes or character references
- Harry Potter house colors and mottos
- Marvel or superhero themes
- Classic film quotes adapted to graduation contexts
- TV show references meaningful to your generation
Music and Lyrics:
Song lyrics resonate with many graduates:
- Inspirational lyrics from favorite artists
- Graduation-appropriate song references
- Music genre imagery
- Artist names or album references
- Musical notes spelling out meaningful phrases
Literary and Book Themes:

Booklovers celebrate literary connections:
- Favorite book quotes
- Author references
- Literary character imagery
- “Turning the Page” or book-themed metaphors
- Genre-specific design elements
Thank You and Appreciation Themes
Family Recognition:
Many graduates acknowledge support systems:
- “Thanks Mom & Dad”
- Family-specific messages in multiple languages
- “First Generation Graduate” pride
- Immigrant family journey recognition
- Specific family member dedications
Teacher and Mentor Appreciation:
Honoring influential educators:
- “Thanks to my teachers”
- Specific teacher name mentions (with permission)
- Educational influence acknowledgments
- Mentor appreciation
Friend and Peer Tributes:
Celebrating relationships:
- “We made it” with friends’ initials
- Squad or friend group references
- Shared experience acknowledgments
Humorous and Clever Designs
Puns and Wordplay:
Clever language creates memorable caps:
- “Now I’m like $100,000 in debt, whoops” (with appropriate tone)
- “I came. I saw. I made it awkward.”
- Subject-specific puns relevant to majors
- School mascot or name wordplay
Meme and Internet Culture References:
Current graduates incorporate modern humor:
- Appropriate meme formats
- Internet culture references
- Emoji combinations
- Trending phrase adaptations
Self-Deprecating Humor:
Lighthearted self-reflection:
- “I’m still not sure what I want to be when I grow up”
- “Nailed it” (sometimes, maybe)
- “Thanks Google” or “Wikipedia made this possible”
Keep humor appropriate for all audiences and avoid anything potentially offensive or unprofessional in formal ceremony contexts.
Tips for Making Your Design Stand Out
Creating distinctive caps requires attention to execution details beyond just concept selection.
Readability and Visual Impact
Choose Appropriate Letter Sizes:
Text too small becomes unreadable from even short distances, defeating the purpose of displaying messages. As a general rule:
- Main text should be at least 2-3 inches tall
- Secondary text can be 1-2 inches
- Avoid anything smaller than 1 inch that won’t read well in photos or from audience distance
High Contrast for Visibility:
Ensure text and design elements contrast strongly with background colors:
- Dark text on light backgrounds or vice versa
- Avoid low-contrast combinations (light gray on white, navy on black)
- Test readability by viewing your design from 10-15 feet away
Strategic Color Selection:
Choose colors thoughtfully:
- School colors show institutional pride
- Complementary colors create visual appeal
- Too many colors can appear busy or chaotic
- 2-4 colors typically provide optimal balance
Quality Execution Techniques
Clean Cutting and Precise Placement:
Professional appearance comes from careful execution:
- Cut letters and shapes with clean, straight edges
- Remove any stray fibers or ragged edges before applying
- Use rulers or guides to ensure straight text alignment
- Leave adequate spacing between letters for readability
Adequate Adhesive Application:
Decoration failures typically result from insufficient glue:
- Apply adhesive across entire back surfaces, not just edges or corners
- For hot glue, work quickly while glue remains molten for best adhesion
- Press elements firmly for 10-15 seconds to ensure bonding
- Allow proper curing time before testing or wearing
Symmetry and Balance:
Visually appealing designs demonstrate balance:
- Center primary elements using measurement rather than eyeballing
- Distribute decorative elements evenly across the cap surface
- Avoid clustering everything in one area leaving other sections empty
- Step back periodically during decoration to assess overall balance
Durability and Longevity Considerations
Weather-Appropriate Materials:
Consider ceremony conditions:
- Outdoor ceremonies in warm weather: Avoid materials that melt or wilt in heat
- Potential rain: Choose water-resistant materials or protect caps appropriately
- Wind: Ensure lightweight elements are extremely well-secured
Transportation Protection:
Protect your completed cap:
- Transport decorated caps flat in large bags or boxes preventing crushing
- Avoid stacking anything on top of decorated caps
- Bring adhesive or repair supplies to ceremonies for emergency fixes
- Take photos of completed designs before transportation in case restoration is needed
Preserving Your Decorated Cap After Graduation
Your decorated graduation cap represents significant time investment and meaningful milestone commemoration—proper preservation protects this keepsake.
Immediate Post-Ceremony Care
Gentle Handling:
After ceremonies conclude:
- Carry caps carefully preventing crushing or bending
- Avoid tossing caps during traditional cap-throwing moments if you want to preserve decorations (consider buying a second plain cap specifically for tossing)
- Transport in protected containers or bags
- Keep away from heat sources that might melt adhesive
Documentation Before Storage:
Photograph your cap thoroughly:
- Take high-quality photos from multiple angles in good lighting
- Include close-ups of detailed elements
- Photograph yourself wearing your decorated cap
- Capture images with family, friends, or significant locations
- These photos preserve memories even if physical caps deteriorate over time
Long-Term Storage Methods
Shadow Box Display:
The most popular preservation method creates attractive wall displays:
- Purchase shadow boxes sized for graduation caps (typically 12" x 12" or larger)
- Position cap face-up showing decoration
- Include tassel, diploma, graduation program, or other memorabilia in the same display
- Hang in bedrooms, home offices, or memory walls
- Provides daily visual reminder of achievement while protecting from dust and damage
Archival Storage:
For those preferring storage over display:
- Use acid-free tissue paper between cap and storage container
- Choose archival-quality boxes in climate-controlled areas
- Avoid basements, attics, or garages with temperature/humidity fluctuations
- Store flat preventing warping or crushing
- Label boxes clearly for future identification
Digital Preservation:
Creating digital records ensures permanent memory preservation:
- Scan or photograph caps in high resolution
- Store digital files in multiple locations (cloud storage, external drives)
- Include caps in digital photo albums or yearbook projects
- Share on social media or personal websites celebrating achievements
Many schools now incorporate graduate achievements into permanent digital recognition systems, creating searchable databases where students’ accomplishments, photos, and milestones are preserved indefinitely alongside caps and physical memorabilia families maintain personally.
How Schools Celebrate and Preserve Graduation Achievements
While individual cap decoration celebrates personal journeys, schools simultaneously honor graduating classes through institutional recognition preserving these milestone accomplishments for future generations.
Institutional Recognition Beyond Individual Celebrations
Forward-thinking schools recognize that graduation achievements deserve lasting documentation extending beyond single ceremonies:
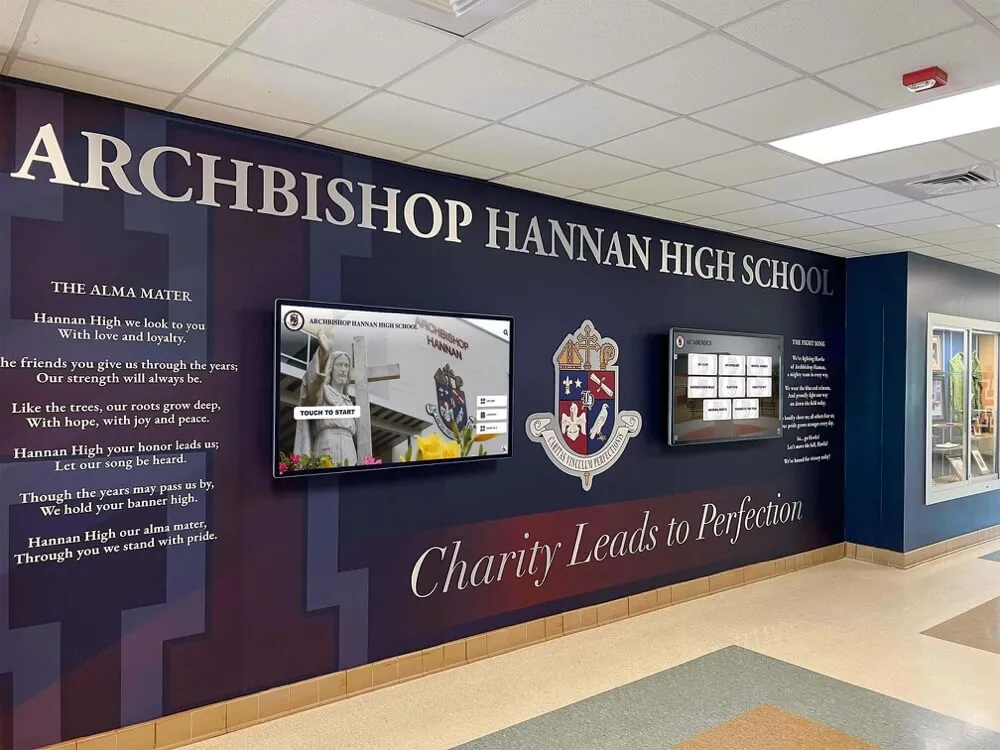
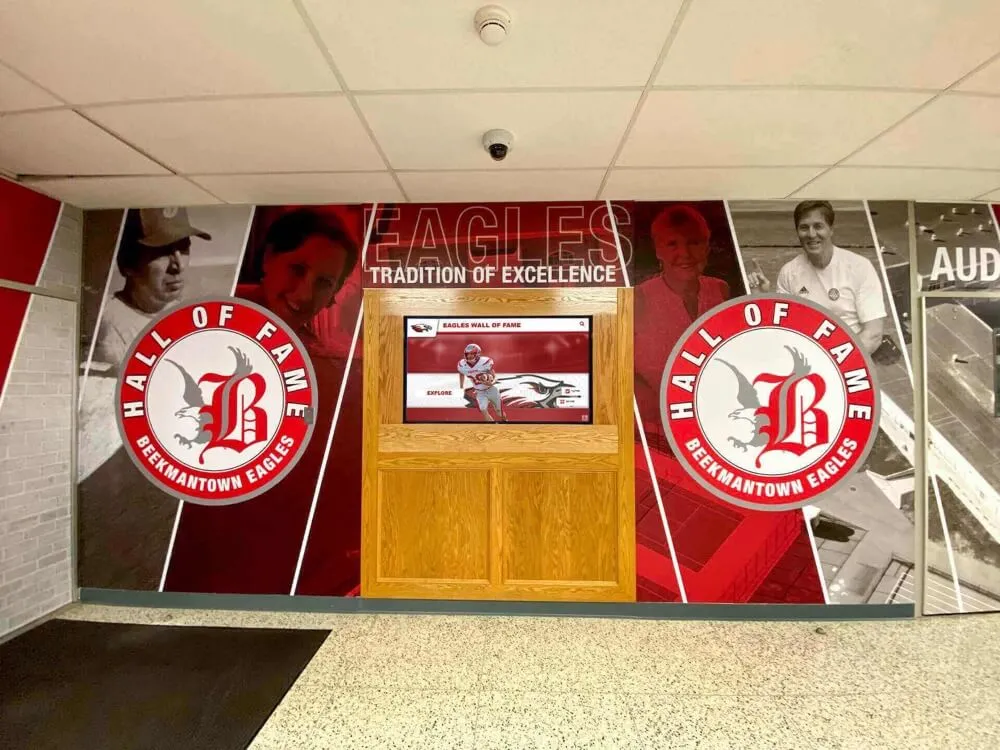
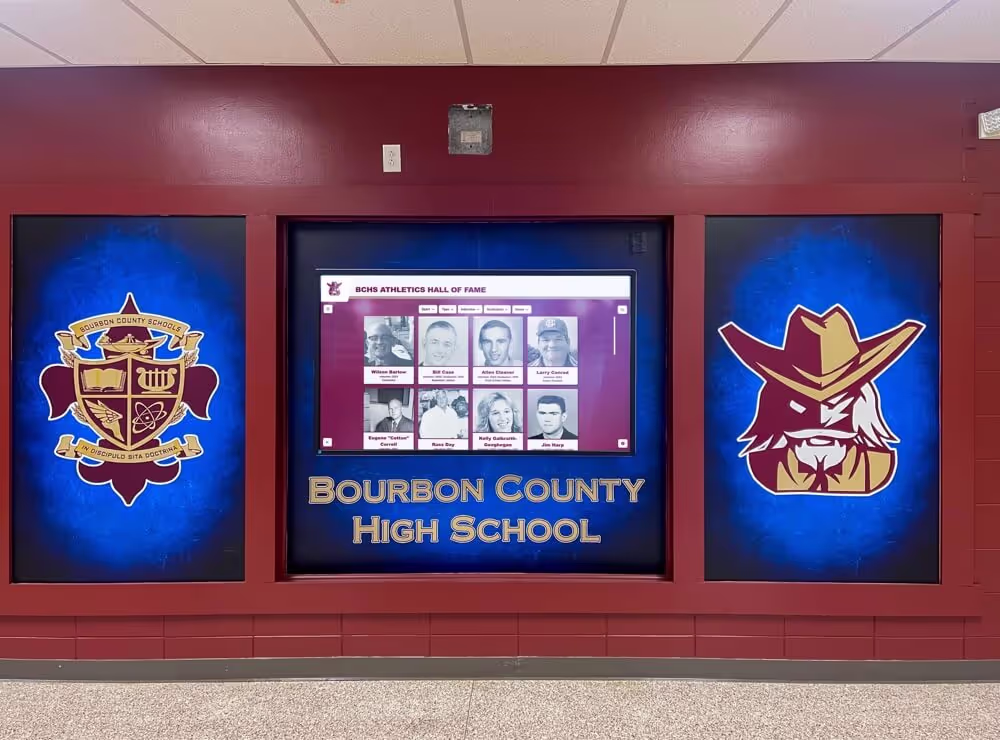
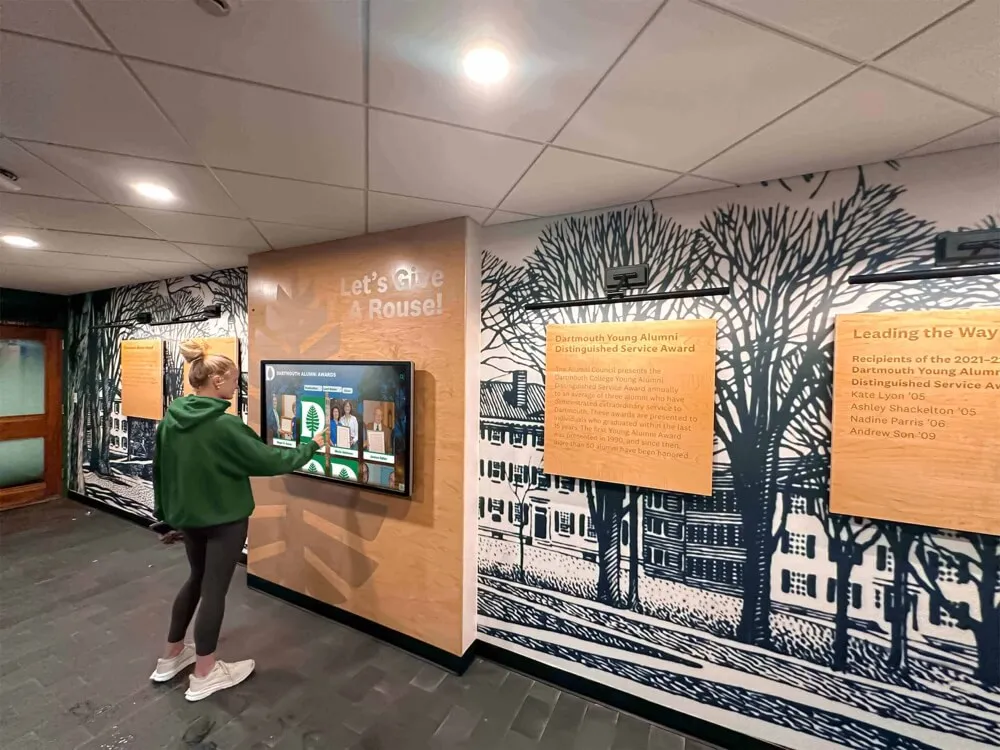
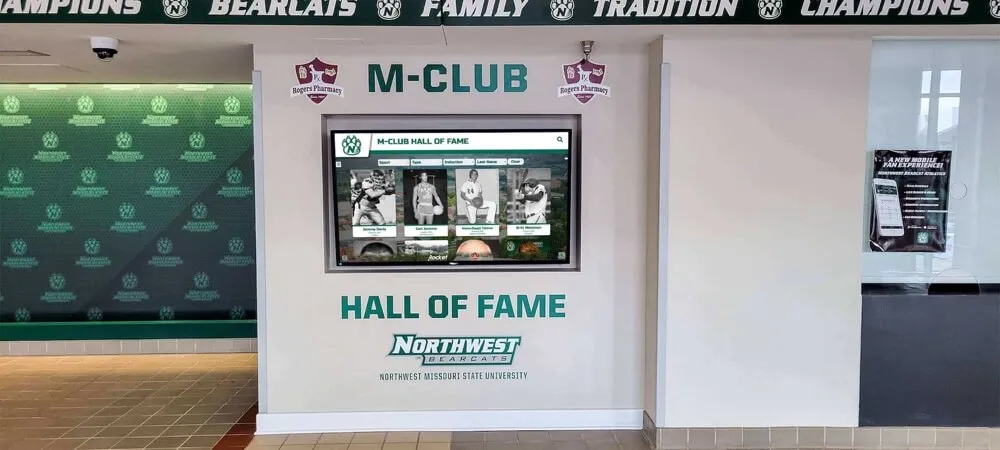
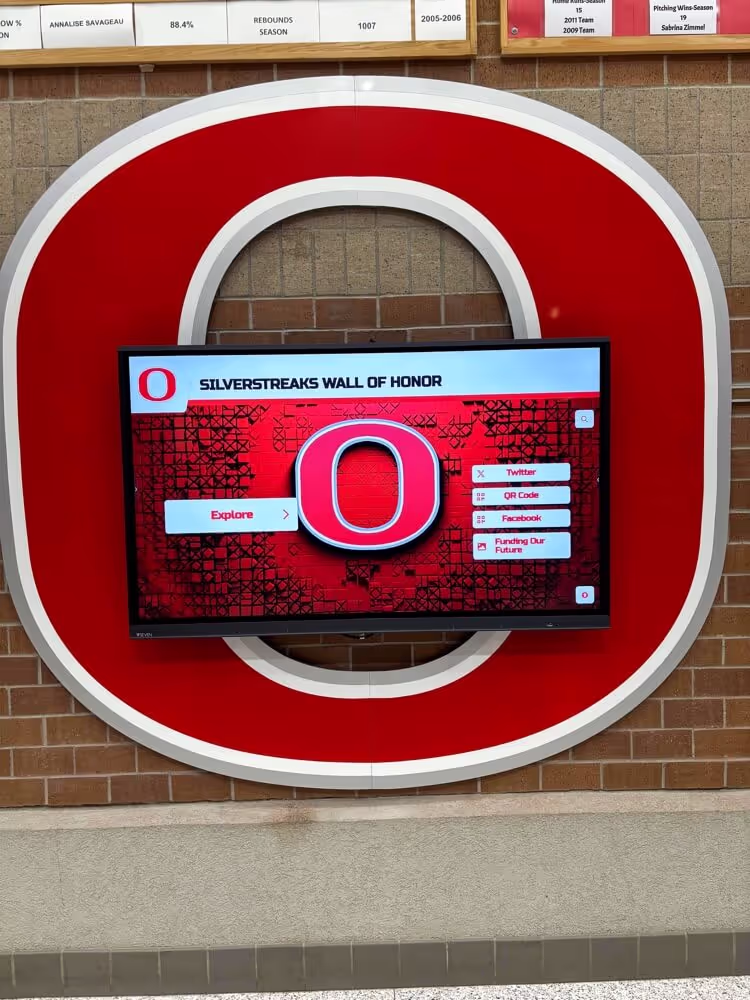
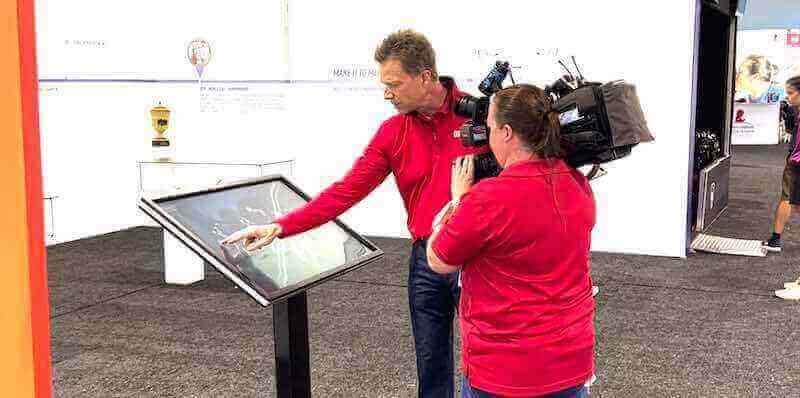
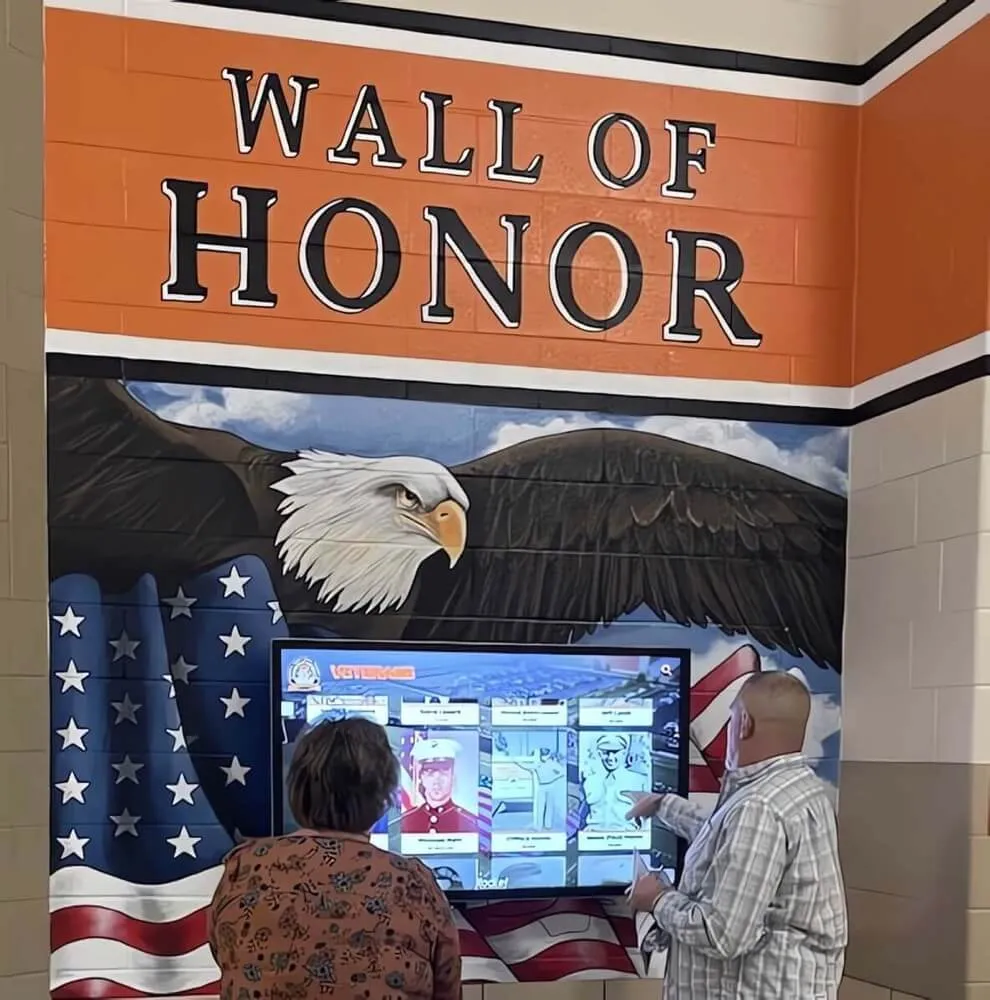
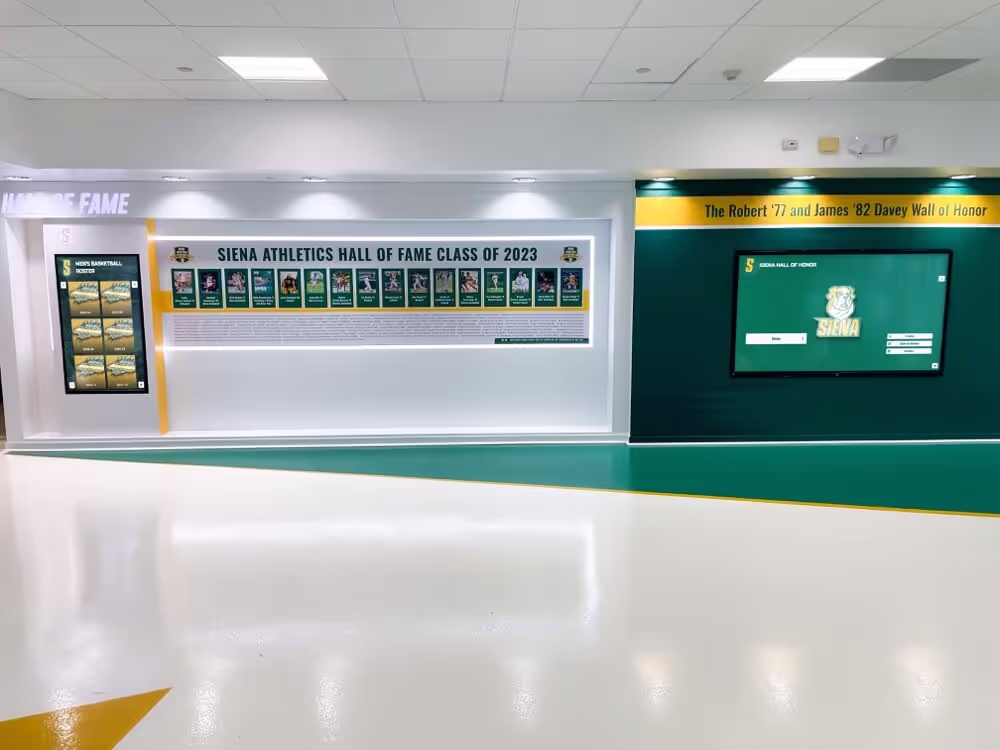
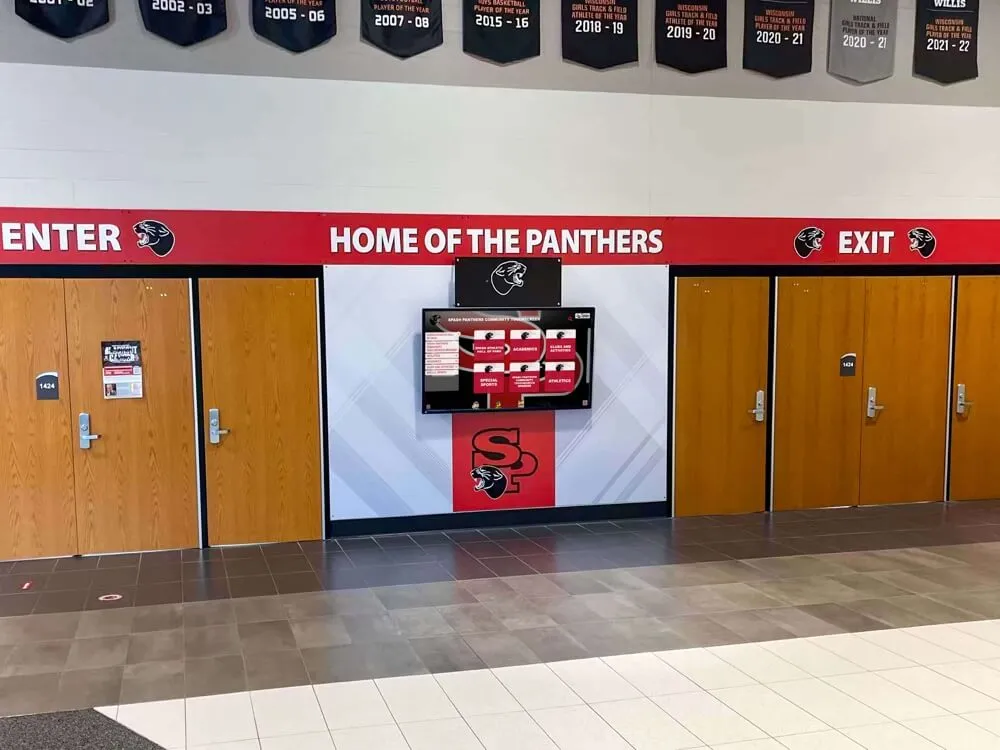
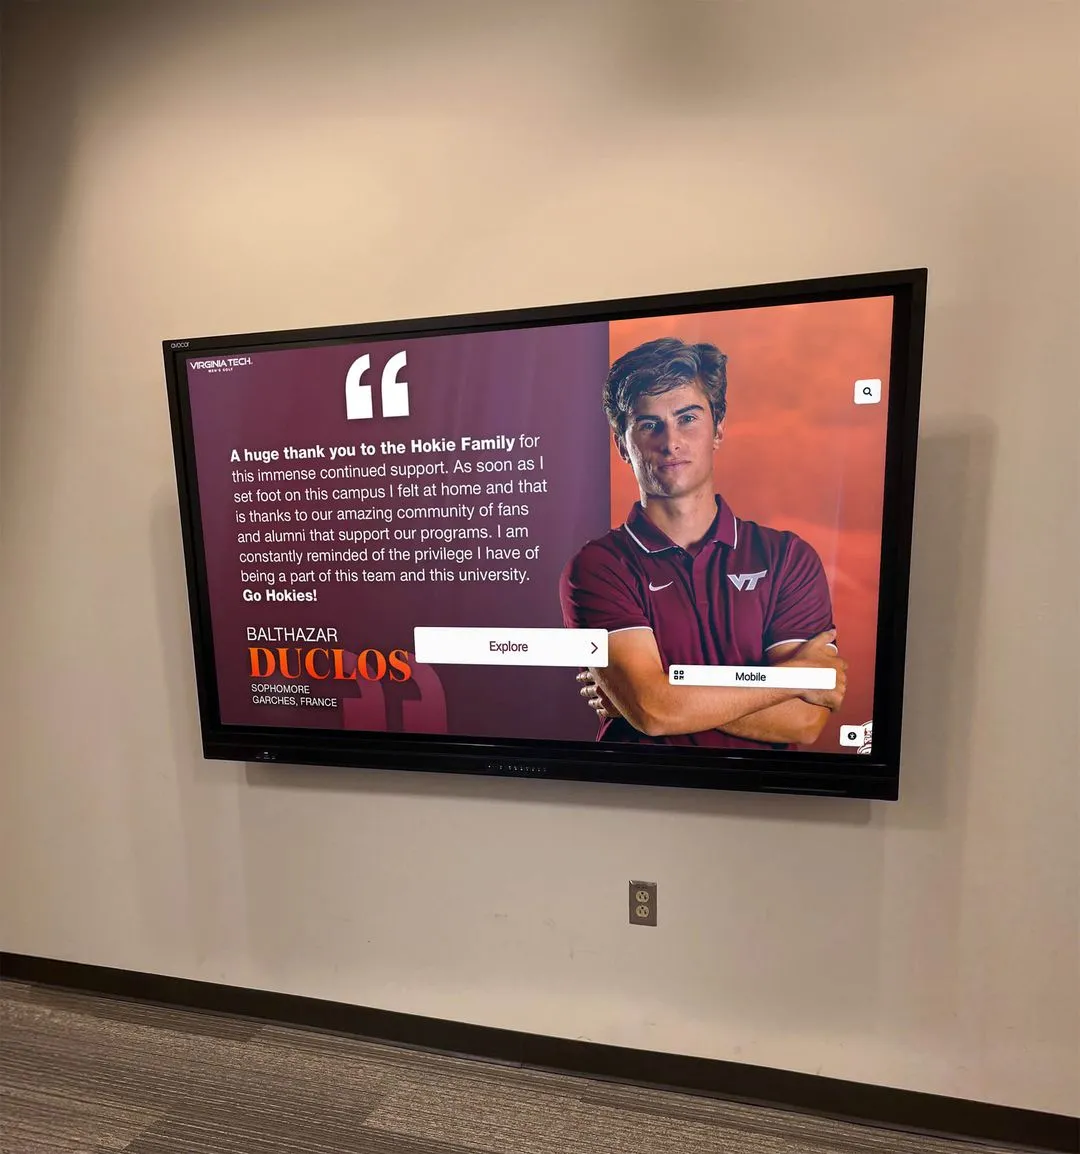
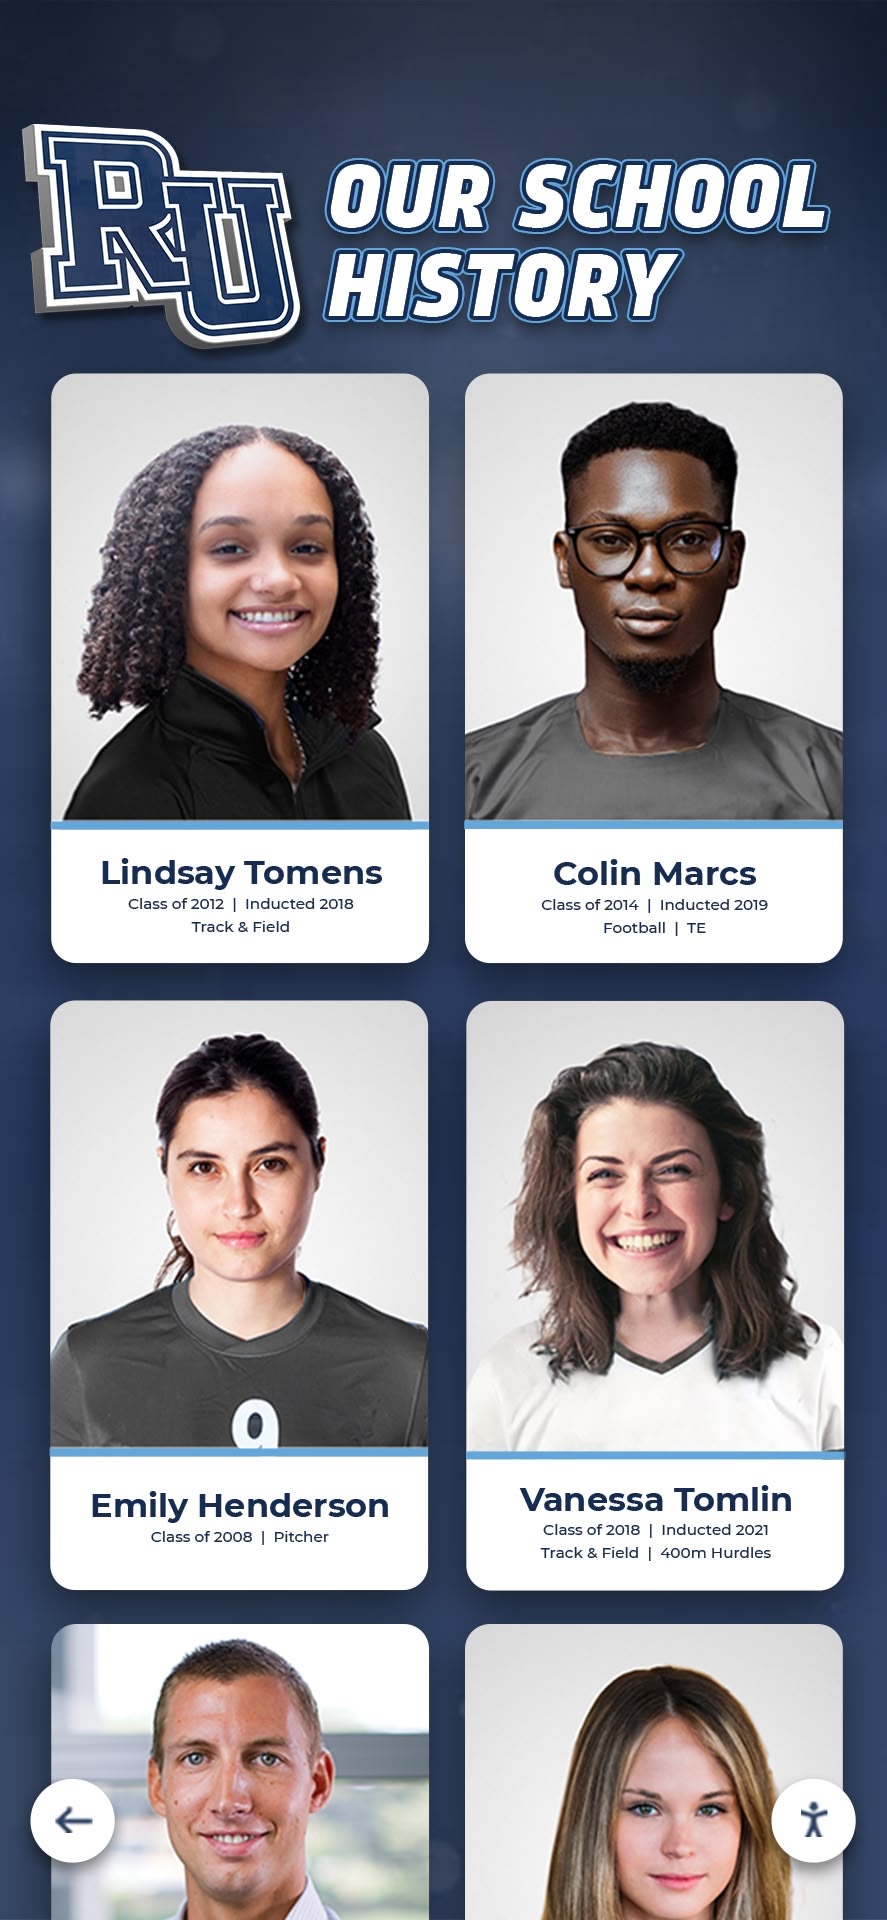
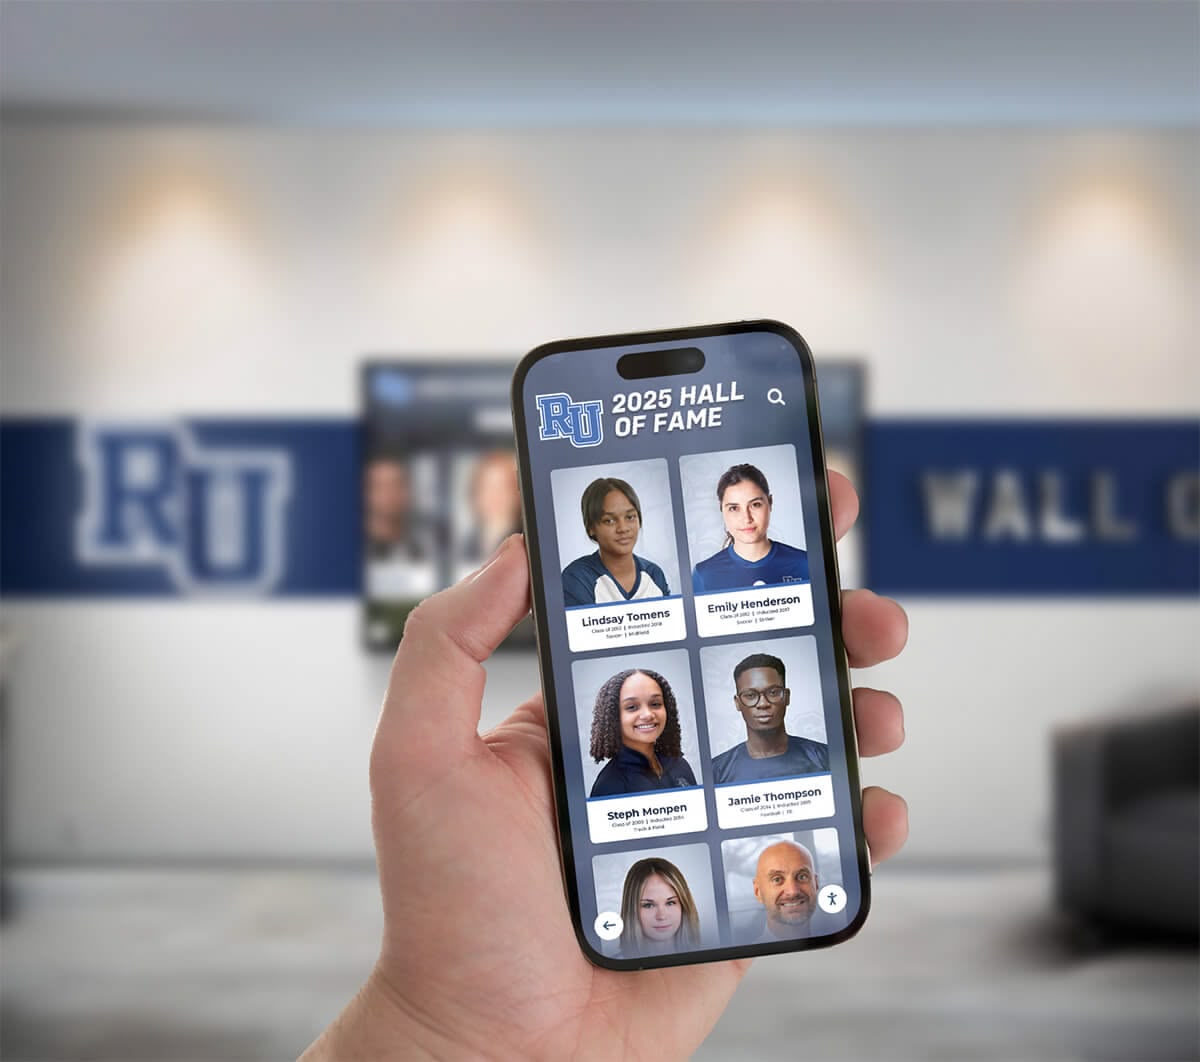
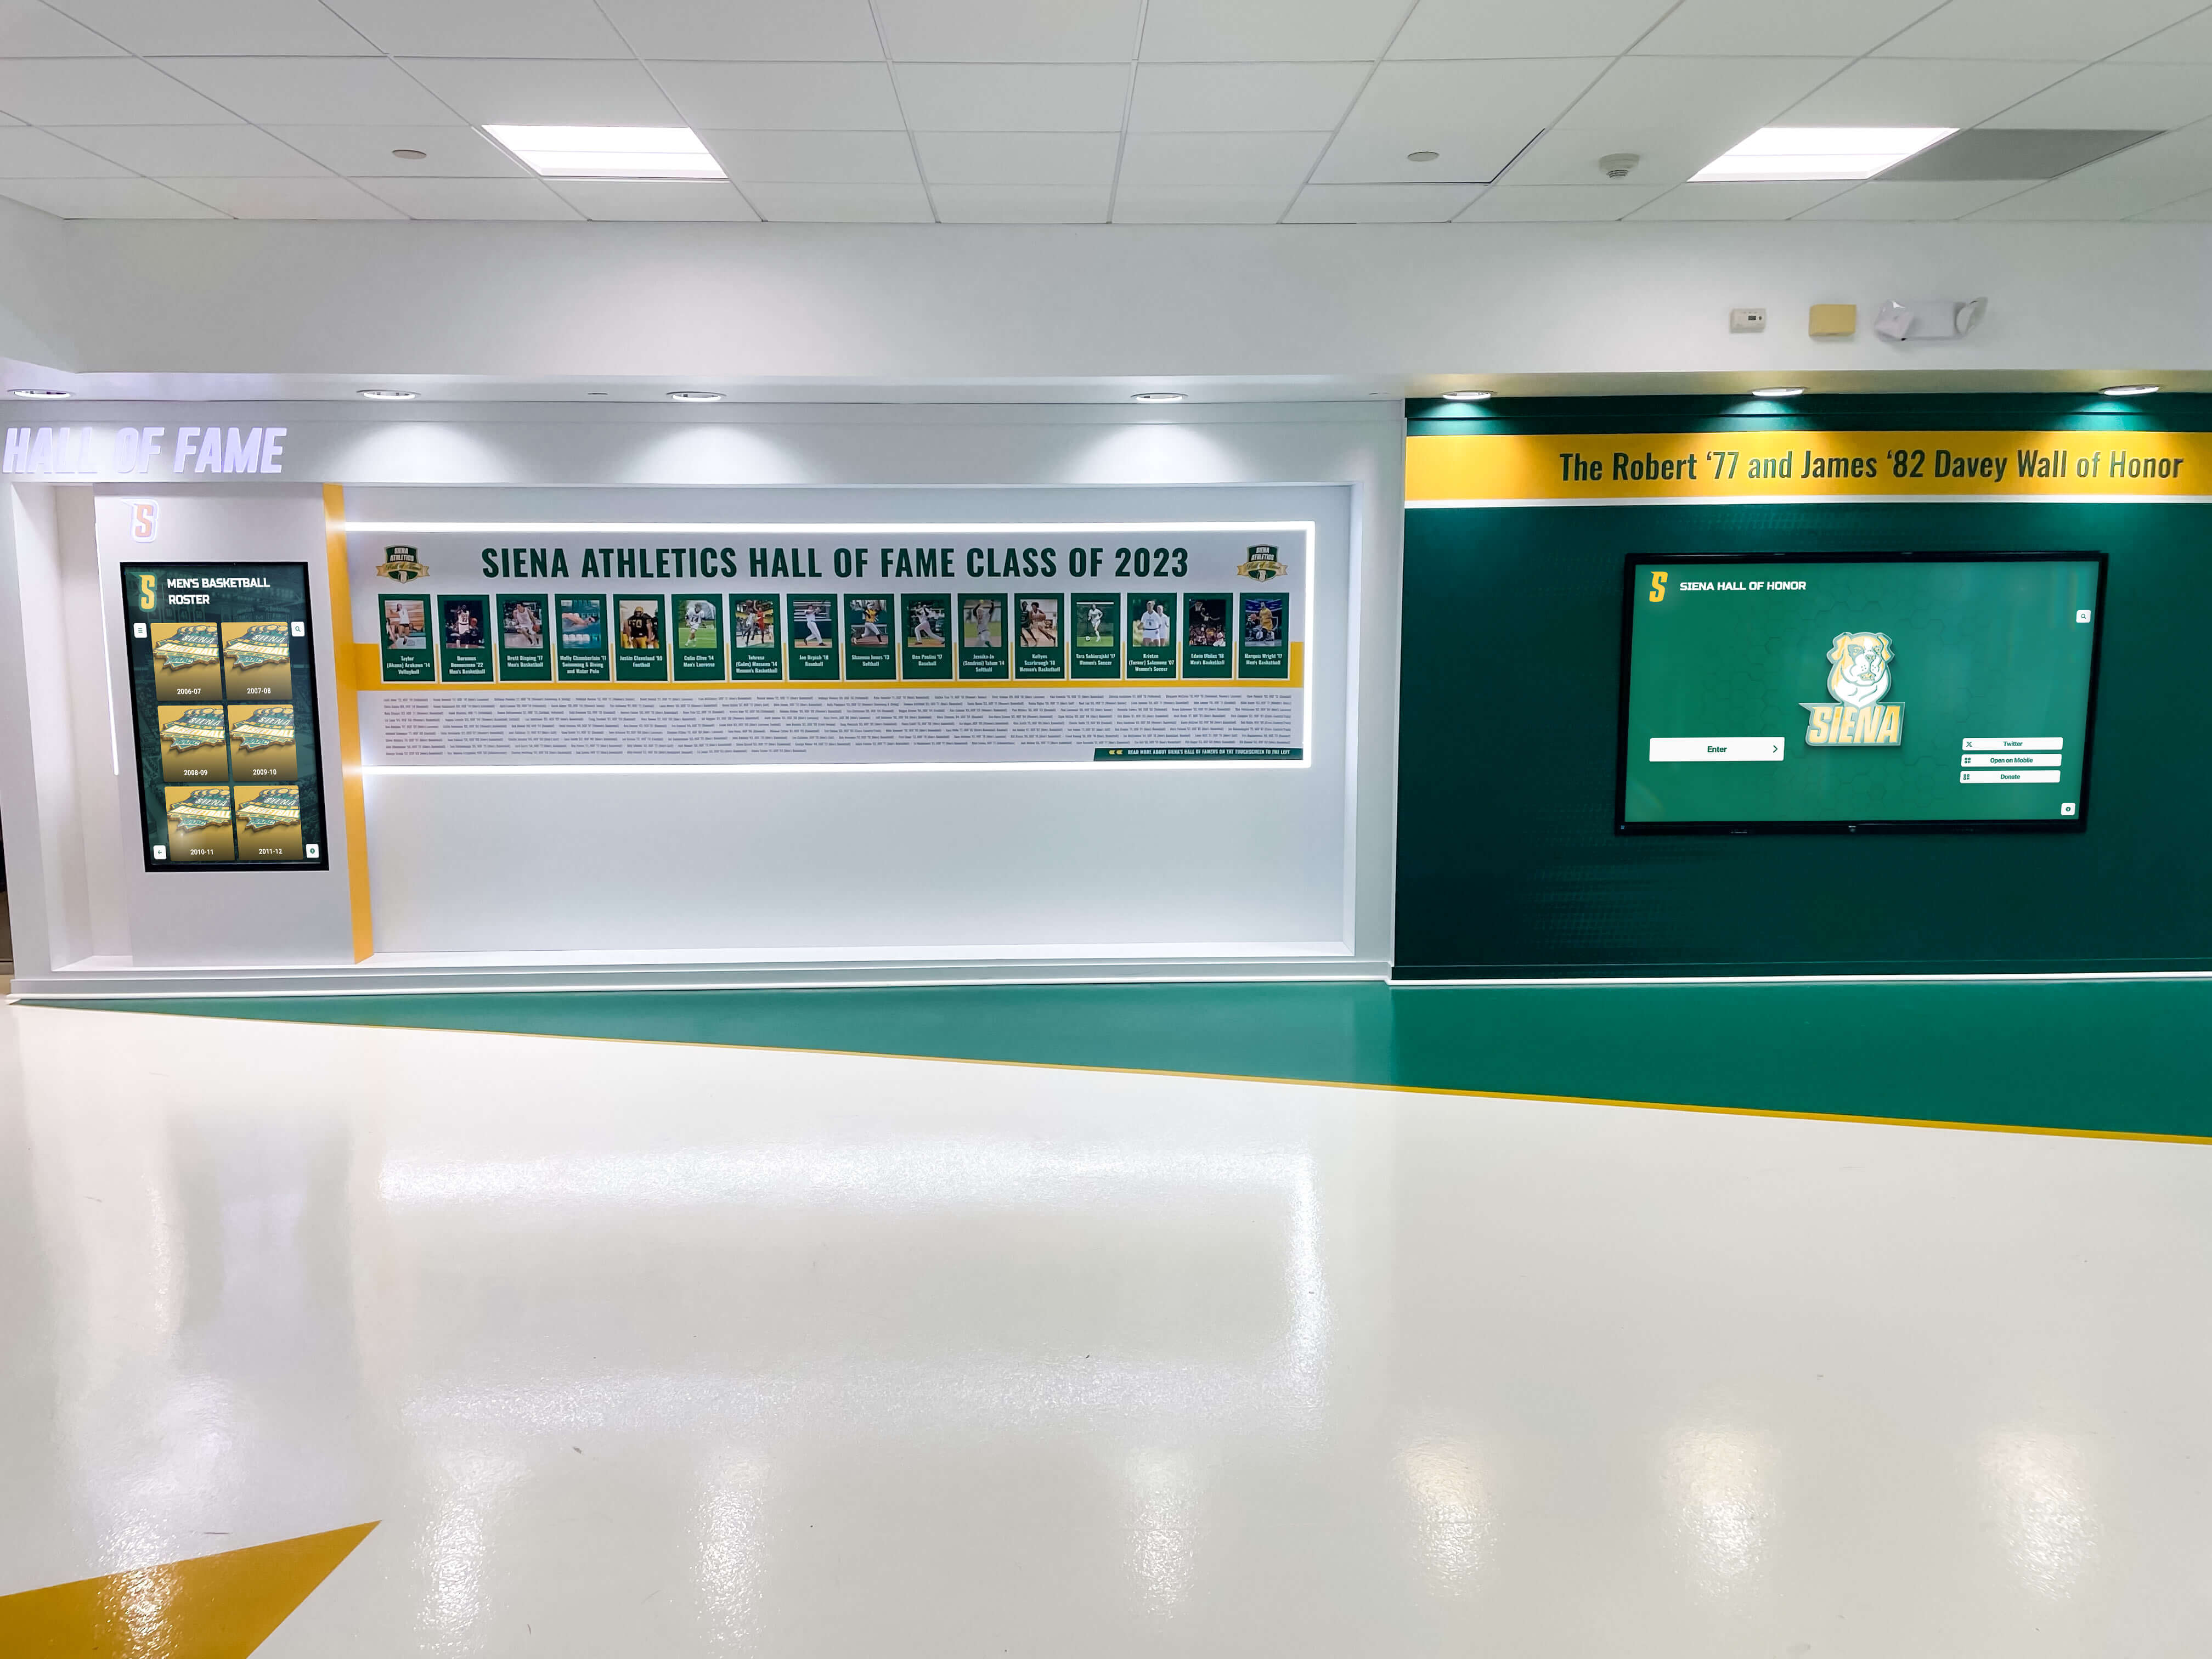
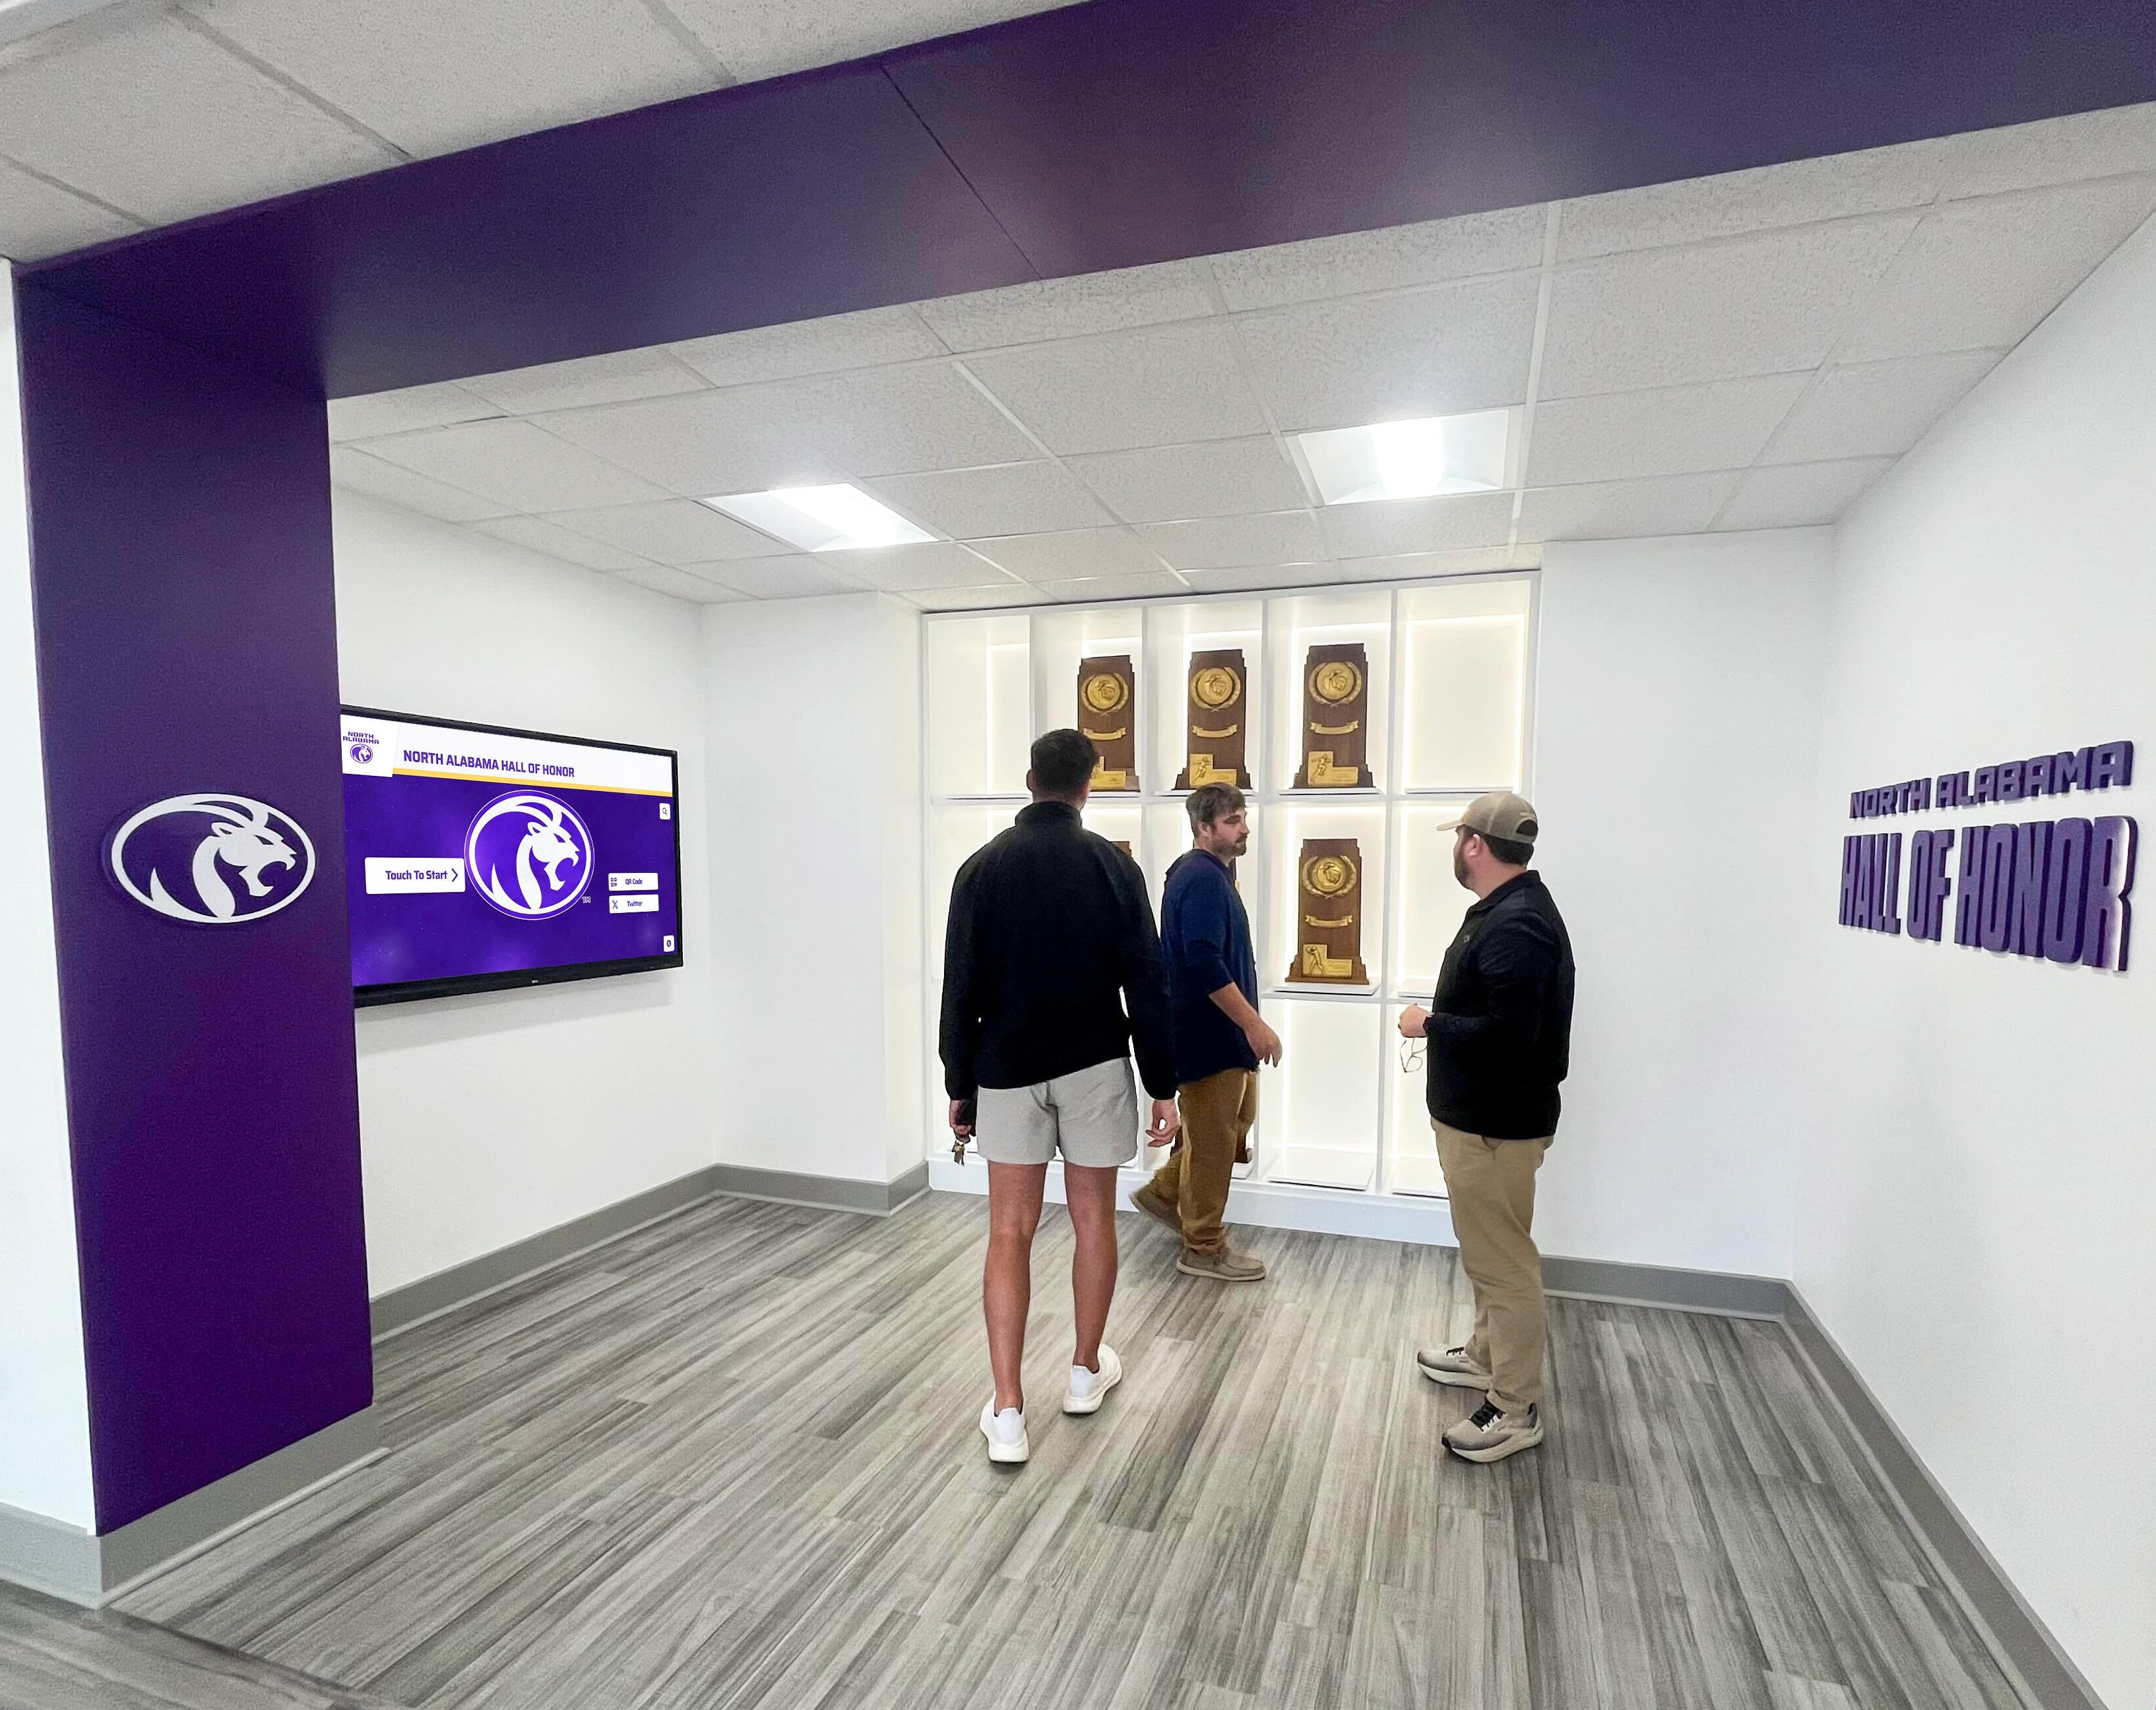
Permanent Graduate Recognition:
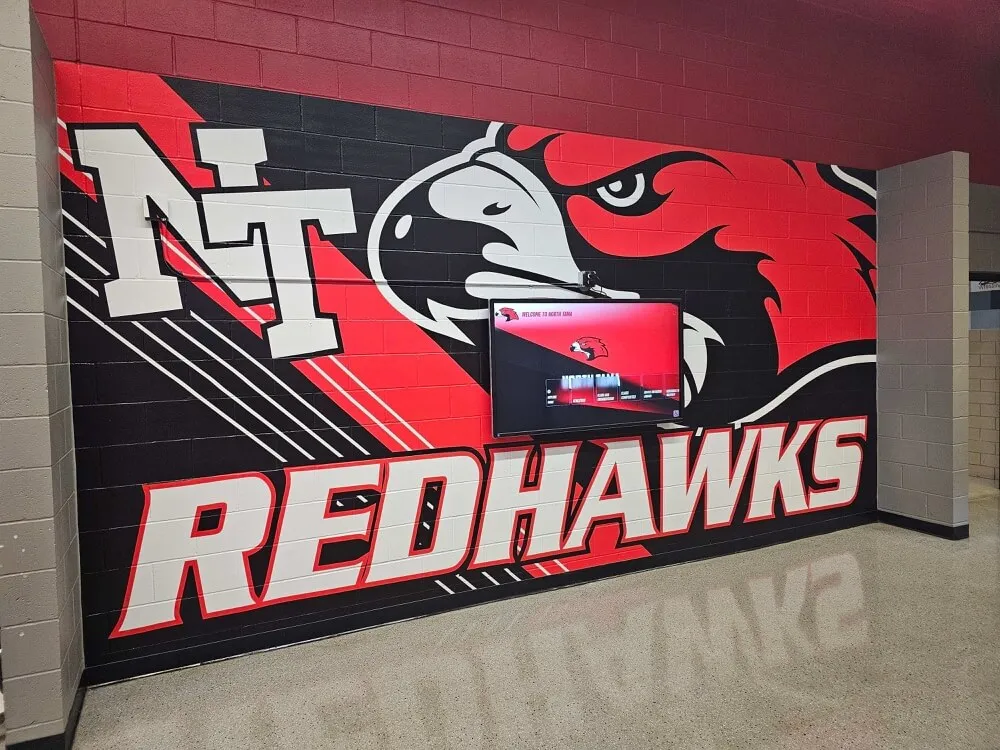
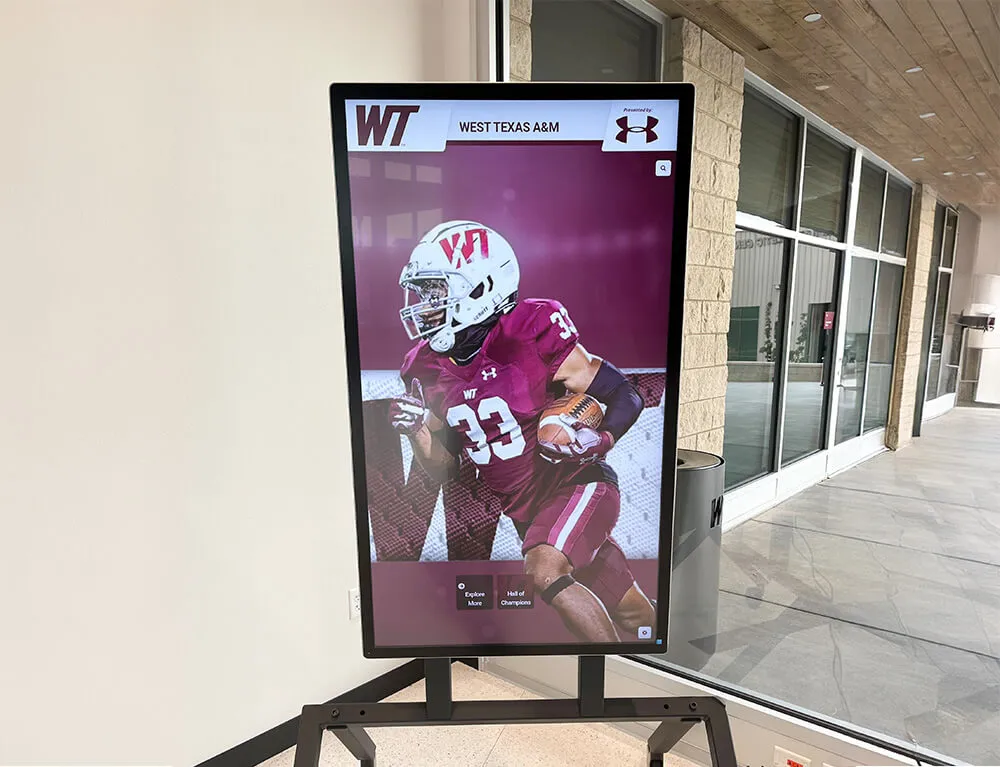
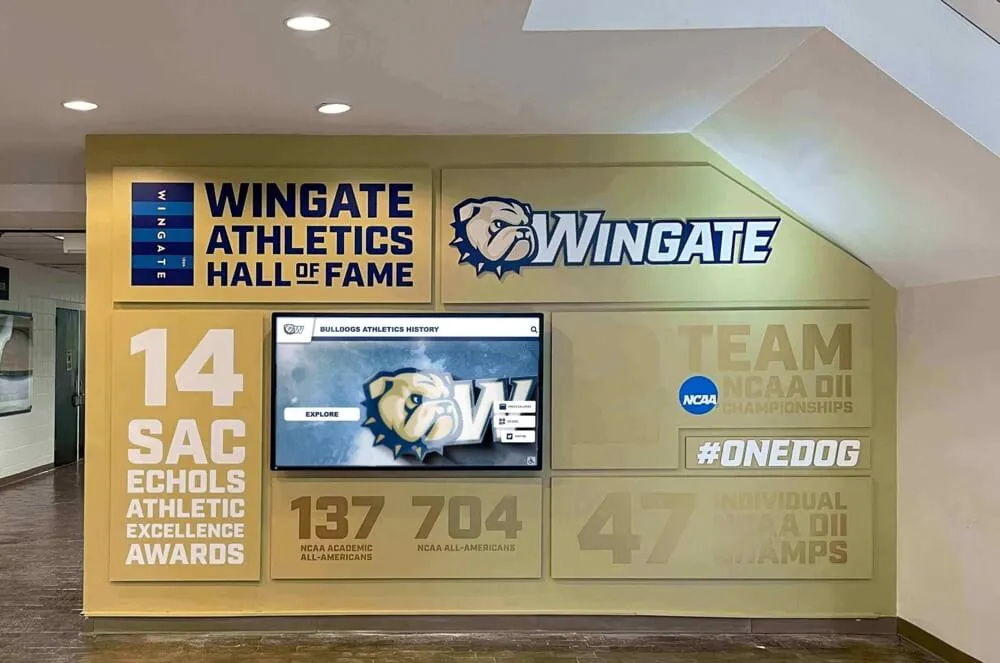
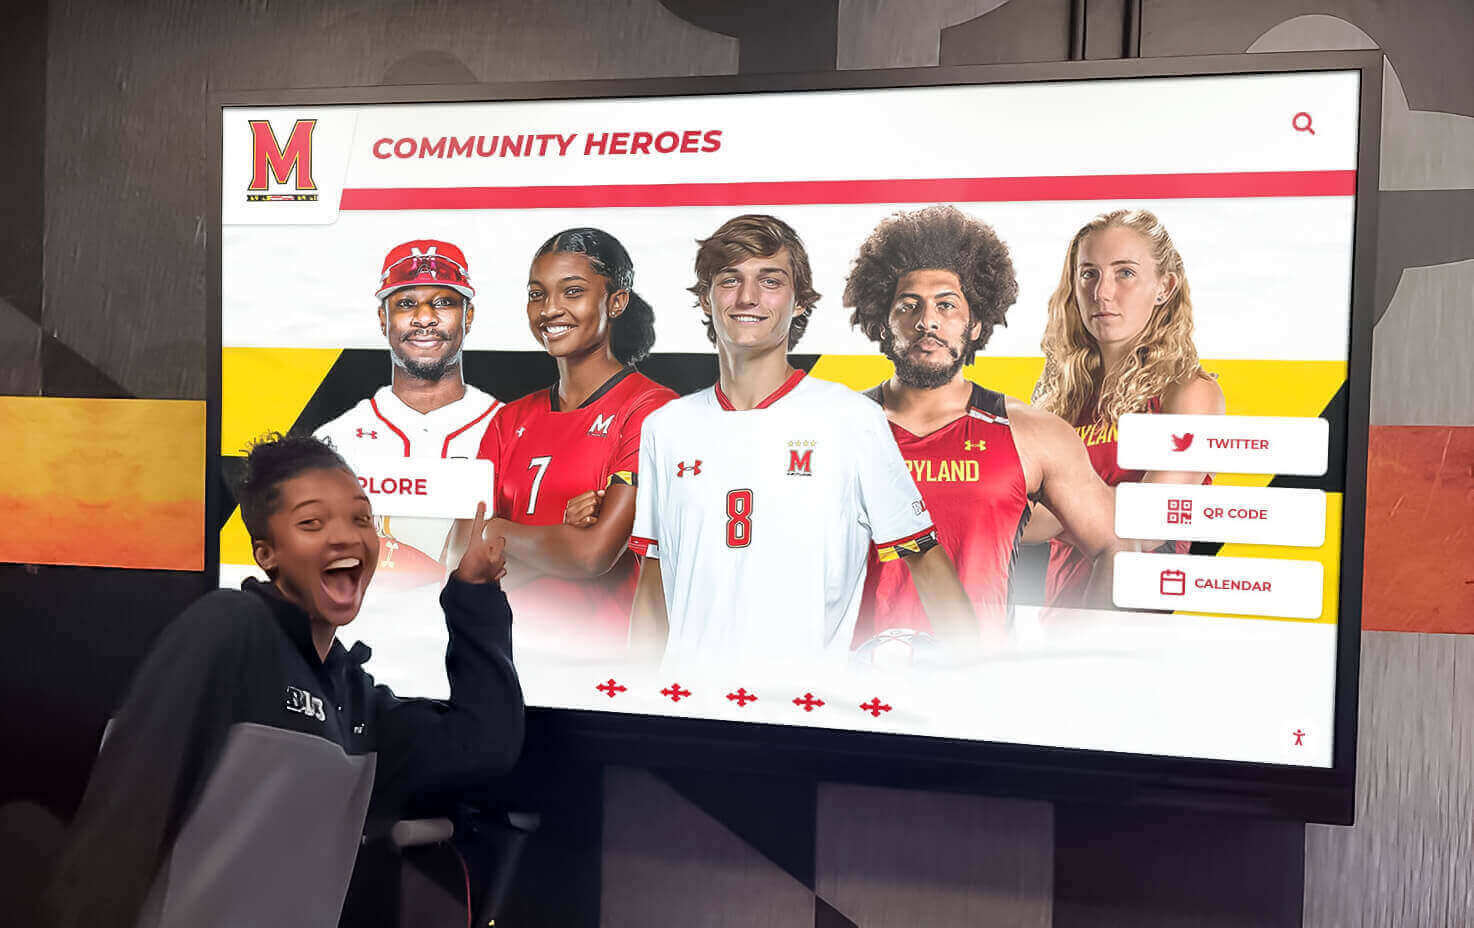
Many institutions now showcase graduates through:
- Digital recognition displays featuring graduating class profiles
- Interactive touchscreen systems allowing visitors to search graduates by year, name, or achievement
- Comprehensive databases including photos, honors, scholarships, college destinations, and accomplishments
- Social media integration enabling families to share institutional recognition
- Alumni networks connecting graduates across decades through searchable systems
These permanent recognition systems complement personal celebrations like cap decoration by creating official institutional records honoring graduate contributions to school legacies.
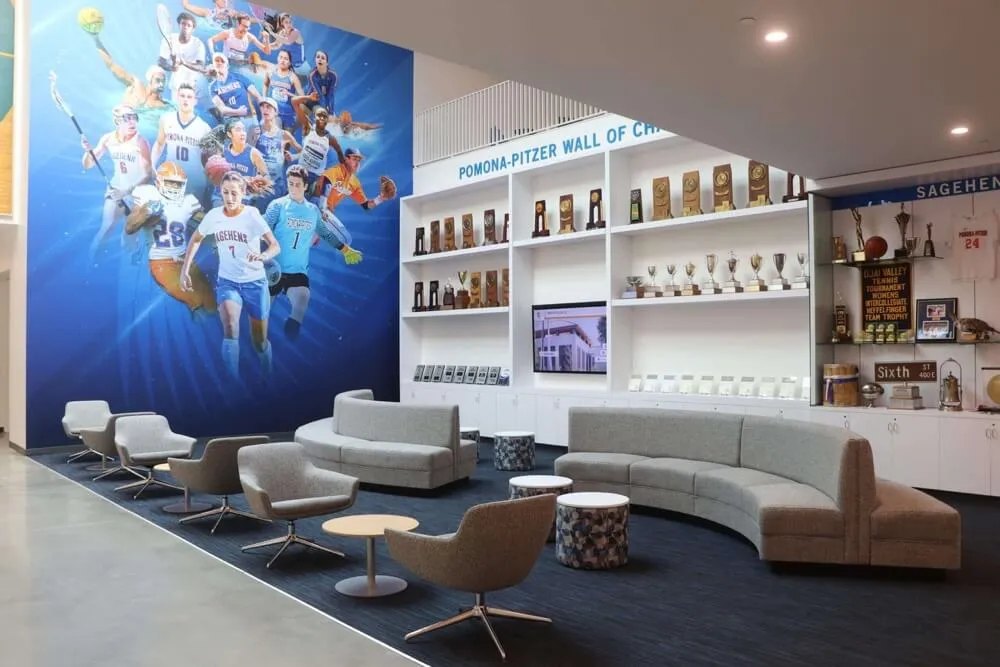
Preserving Graduation Traditions:
Schools document graduation traditions through:
- Photo archives from ceremonies capturing decorated caps, processionals, and celebration moments
- Video recordings of commencement speeches, award presentations, and special recognition
- Digital yearbooks featuring graduation day highlights
- Historical databases showing graduation traditions’ evolution across decades
Modern digital recognition platforms enable schools to create comprehensive graduate profiles that families access remotely, share with extended family, and reference years later when reminiscing about graduation accomplishments. These systems transform traditional static plaques or physical trophies into engaging, searchable displays preserving not just names and years but complete graduate stories including achievements that decorated caps often celebrate.
Connecting Personal and Institutional Recognition:
The most meaningful graduation recognition occurs when personal celebrations—like creative cap decoration—align with institutional documentation:
- Families photograph decorated caps alongside school displays honoring their graduate
- Social media posts combine personal decoration photos with school recognition tags
- Graduate profiles in digital systems reference achievements students highlighted on caps
- Schools feature decorated cap photos in yearbooks or recognition displays
This parallel recognition—students celebrating personally through cap decoration while schools preserve achievements institutionally—creates comprehensive acknowledgment ensuring graduates receive recognition from both personal communities and institutions that shaped their development.
Conclusion: Creating Meaningful Graduation Cap Keepsakes
Decorating your graduation cap transforms standard ceremonial regalia into personal expression celebrating your unique educational journey, achievements, and personality. Whether showcasing academic honors, future plans, personal interests, or heartfelt appreciation, thoughtfully designed caps create distinctive visual statements while generating lasting memories and keepsakes from this significant milestone.
The most successful cap decorations share common characteristics regardless of specific themes or styles:
- Meaningful personal connection rather than generic trending designs copied without relevance
- Policy compliance ensuring your creative work isn’t wasted on designs requiring removal
- Quality execution through proper materials, adequate adhesion, and attention to detail
- Readable designs with appropriate sizing, contrast, and balance
- Durability withstanding ceremony conditions and potential weather challenges
- Preservation planning protecting your creative work as a lasting keepsake
Beyond individual cap decoration, graduation represents a culminating moment when years of effort, growth, and achievement receive recognition from multiple communities—families celebrating personally, friends acknowledging shared experiences, and schools honoring contributions to institutional legacies. Decorated caps contribute to these multifaceted celebrations as visible, creative expressions of who you’ve become and what you’ve accomplished throughout your educational journey.
As you plan and execute your graduation cap design, remember that this small canvas represents far more than decoration—it’s a declaration of your achievements, a celebration of relationships that supported your success, and a creative expression of the unique person you’ve become through years of educational experiences. Take time to create something genuinely meaningful that you’ll treasure in photos and preservation long after graduation day concludes.
Ready to Celebrate Your Achievement?
While you’re decorating your graduation cap to celebrate your personal journey, explore how schools honor graduates through comprehensive digital recognition displays that preserve graduate achievements, stories, and accomplishments permanently—creating searchable archives ensuring your milestone receives lasting recognition extending far beyond your ceremony day celebration.